Our Blogs

Blog

  • 🍊 संत्री आणि मोसंबी फळगळ: कारणे आणि प्रभावी उपाय

    🍊 संत्री आणि मोसंबी फळगळ: कारणे आणि प्रभावी उपाय

    नमस्कार शेतकरी बांधवांनो! 🙏

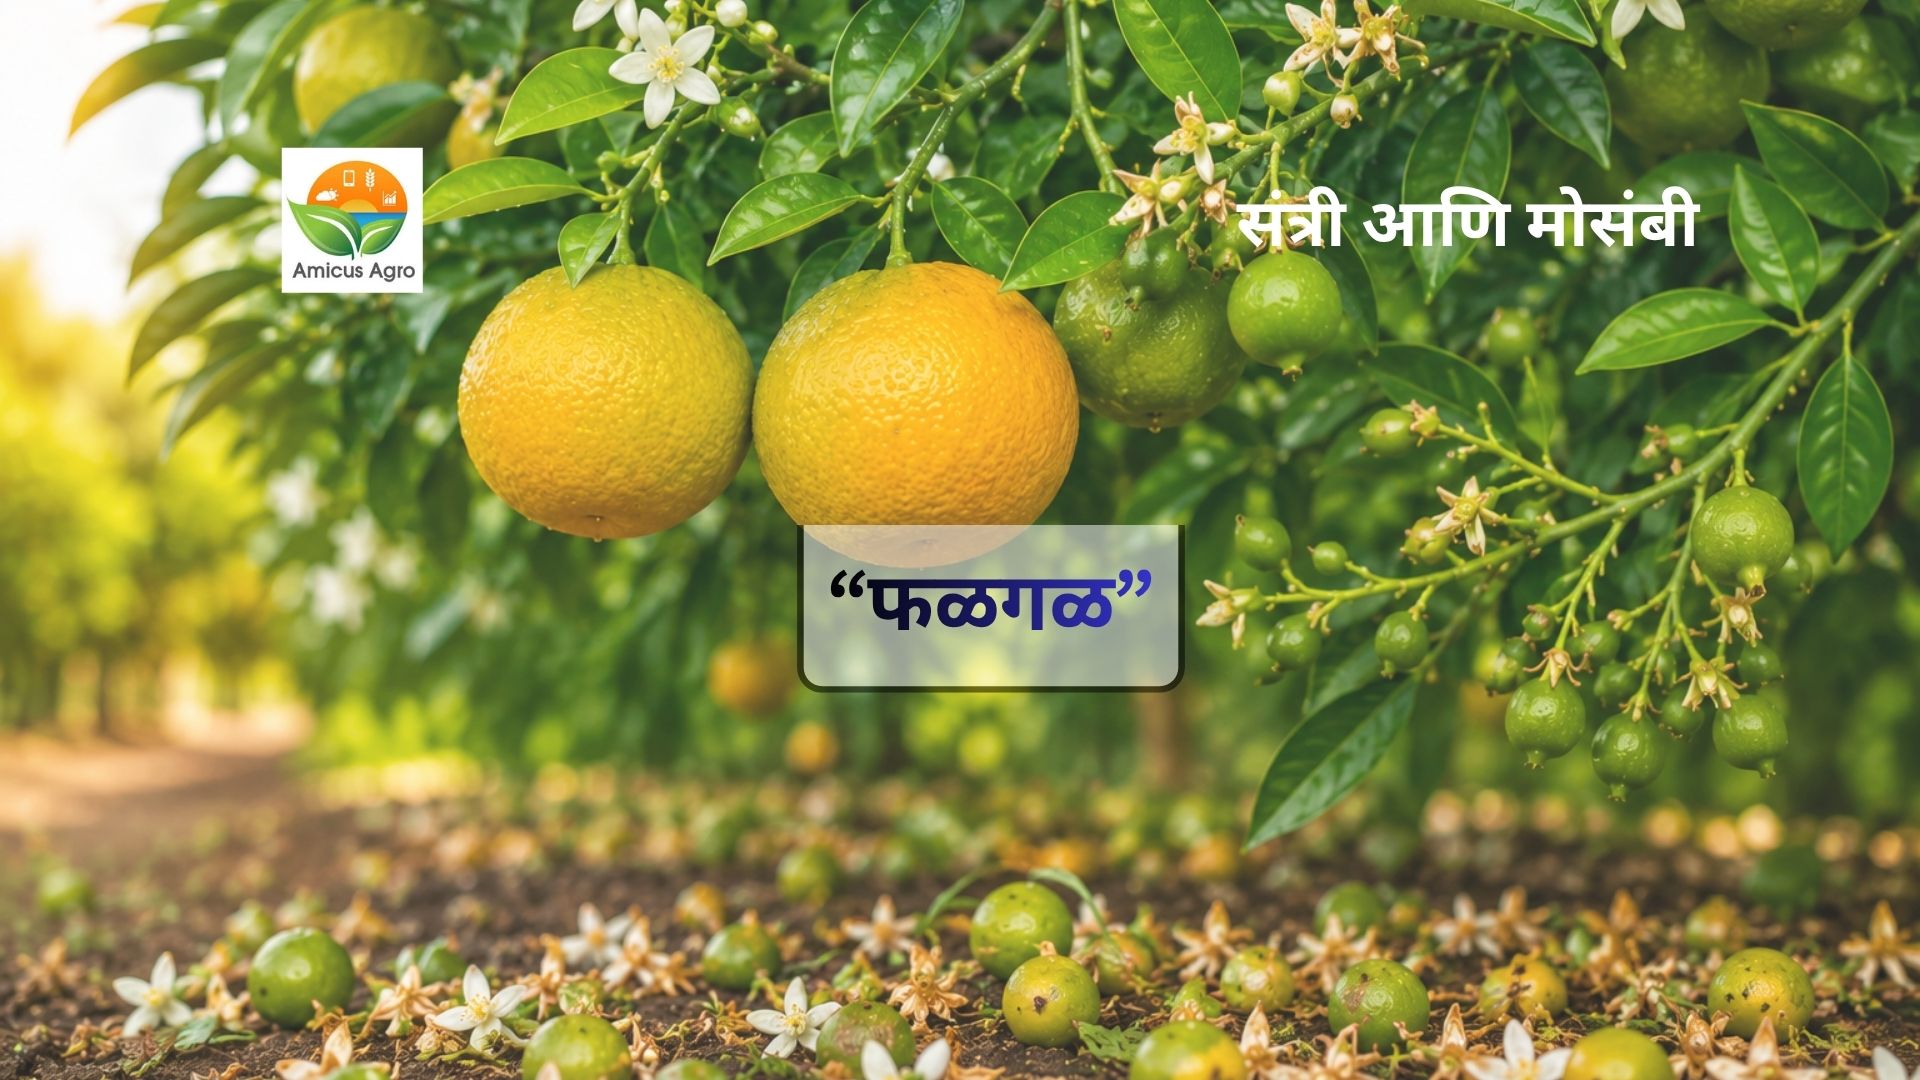
    संत्री आणि मोसंबी बागेत फळधारणा झाल्यानंतर शेतकऱ्यांसमोर सर्वात मोठी डोकेदुखी असते ती म्हणजे ‘फळगळ’. हातातोंडाशी आलेला घास फळगळीमुळे हिरावून घेतला जातो आणि उत्पादनात मोठी घट येते. आजच्या या ब्लॉगमध्ये आपण संत्री आणि मोसंबीमधील फळगळ का होते आणि ती थांबवण्यासाठी कोणती प्रभावी उपाययोजना करावी, याबद्दल सविस्तर माहिती घेणार आहोत.

    ⚠️ फळगळ होण्याची प्रमुख कारणे

    फळगळ ही प्रामुख्याने तीन टप्प्यांत होते: फुलगळ, मटाराच्या आकाराची फळे असताना होणारी गळ आणि फळे पक्व होण्याच्या आधी होणारी गळ. याची प्रमुख कारणे खालीलप्रमाणे आहेत:

    🔹 १. अन्नद्रव्यांची कमतरता: फळांच्या वाढीच्या काळात झाडाला नायट्रोजन, स्फुरद, पालाश यांच्यासह सूक्ष्म अन्नद्रव्यांची (झिंक, बोरॉन, कॅल्शियम) मोठ्या प्रमाणावर गरज असते. ही गरज पूर्ण न झाल्यास झाड स्वतःहून फळे गाळते.

    🔹 २. पाण्याचे असंतुलन: झाडांना पाण्याचा ताण बसणे किंवा जमिनीत अति पाणी साचून राहणे यामुळे मुळांना हवा मिळत नाही आणि फळगळ सुरू होते.

    🔹 ३. हार्मोनल असंतुलन: झाडामध्ये नैसर्गिक संप्रेरकांची (ऑक्झिन्स) पातळी कमी झाल्यामुळे फळाचे देठ कमकुवत होते आणि फळ गळून पडते.

    🔹 ४. रोग आणि किडींचा प्रादुर्भाव: फायटोप्थोरा, कोलेटोट्रिकम यांसारखे बुरशीजन्य आजार आणि फळमाशी, सिट्रस सिला, पतंग यांसारख्या किडींमुळे फळांचे नुकसान होऊन गळ होते.

    🔹 ५. वातावरणातील अचानक बदल: तापमानात अचानक झालेली वाढ किंवा ढगाळ वातावरण यामुळे झाडावर ताण (Stress) येतो.

    🛠️ फळगळ थांबवण्यासाठी प्रभावी उपाययोजना

    फळगळ थांबवण्यासाठी एकात्मिक व्यवस्थापन करणे अत्यंत गरजेचे आहे:

    💧 पाण्याचे योग्य नियोजन: बागेला नेहमी वाफसा स्थितीत पाणी द्यावे. अति पाणी किंवा पाण्याचा ताण पडू देऊ नये. ठिबक सिंचनाचा वापर करणे केव्हाही उत्तम.

    🧪 अन्नद्रव्ये व्यवस्थापन: माती परीक्षणानुसार खतांच्या मात्रा द्याव्यात. फळे लिंबू किंवा बोराच्या आकाराची असताना सूक्ष्म अन्नद्रव्यांची फवारणी करावी.

    🛡️ बुरशी आणि कीड नियंत्रण: बागेत कीड आणि रोगांचा प्रादुर्भाव दिसताच योग्य त्या शिफारशीत बुरशीनाशकांची आणि कीटकनाशकांची फवारणी घ्यावी.

    🌿 संप्रेरकांचा वापर: गरजेनुसार कृषी तज्ञांच्या सल्ल्याने प्लॅनोफिक्स (NAA) किंवा जिब्रेलिक ॲसिड (GA3) ची योग्य मात्रेत फवारणी फळगळ रोखण्यास मदत करते.

    अमिकस ‘Amicarb’ (एनर्जी बूस्टर) – फळगळ थांबवण्यासाठी एक उत्तम पर्याय!

    फळगळीचे एक अत्यंत महत्त्वाचे कारण म्हणजे ‘फिजिओलॉजिकल स्ट्रेस’ (शारीरिक ताण) आणि झाडातील ऊर्जेची कमतरता. फळे पोसण्याच्या अवस्थेत झाडाला प्रचंड ऊर्जेची गरज असते. जेव्हा झाड ही ऊर्जा तयार करू शकत नाही, तेव्हा फळांचा भार कमी करण्यासाठी ते फळे गाळते. अशा वेळी Amicus Agro चे ‘Amicarb’ (एनर्जी बूस्टर) अतिशय प्रभावी ठरते.

    ‘Amicarb’ चे मुख्य फायदे:

    🔋 त्वरित ऊर्जा: हे झाडाला त्वरित उपलब्ध होणारे कार्बोहायड्रेट्स आणि ऊर्जा देते, ज्यामुळे फळे पोसण्यासाठी ताकद मिळते.

    🛡️ ताण नियंत्रण: वातावरणातील बदलांमुळे किंवा पाण्याच्या असंतुलनामुळे येणारा ताण कमी करून फळांची देठे मजबूत करते.

    फळांची गुणवत्ता: फळगळ थांबवण्यासोबतच फळांची फुगवण, चमक आणि गुणवत्ता सुधारण्यास हे एनर्जी बूस्टर मदत करते.

    📌 फवारणीचे प्रमाण (Dose):

    टीप: ‘Amicarb’ ची फवारणी करताना २ मिली प्रति लिटर किंवा एकरी ८०० मिली या प्रमाणे डोस  घ्यावा.

    शेतकरी बांधवांनो, योग्य नियोजन आणि ‘Amicarb’ सारख्या दर्जेदार उत्पादनांच्या वापराने आपण फळगळ नक्कीच रोखू शकतो आणि भरघोस उत्पादन मिळवू शकतो!

  • 🌱 सोयाबीन पिकातील फूलगळ वाढतेय? जाणून घ्या कारणे आणि खात्रीशीर उपाय!

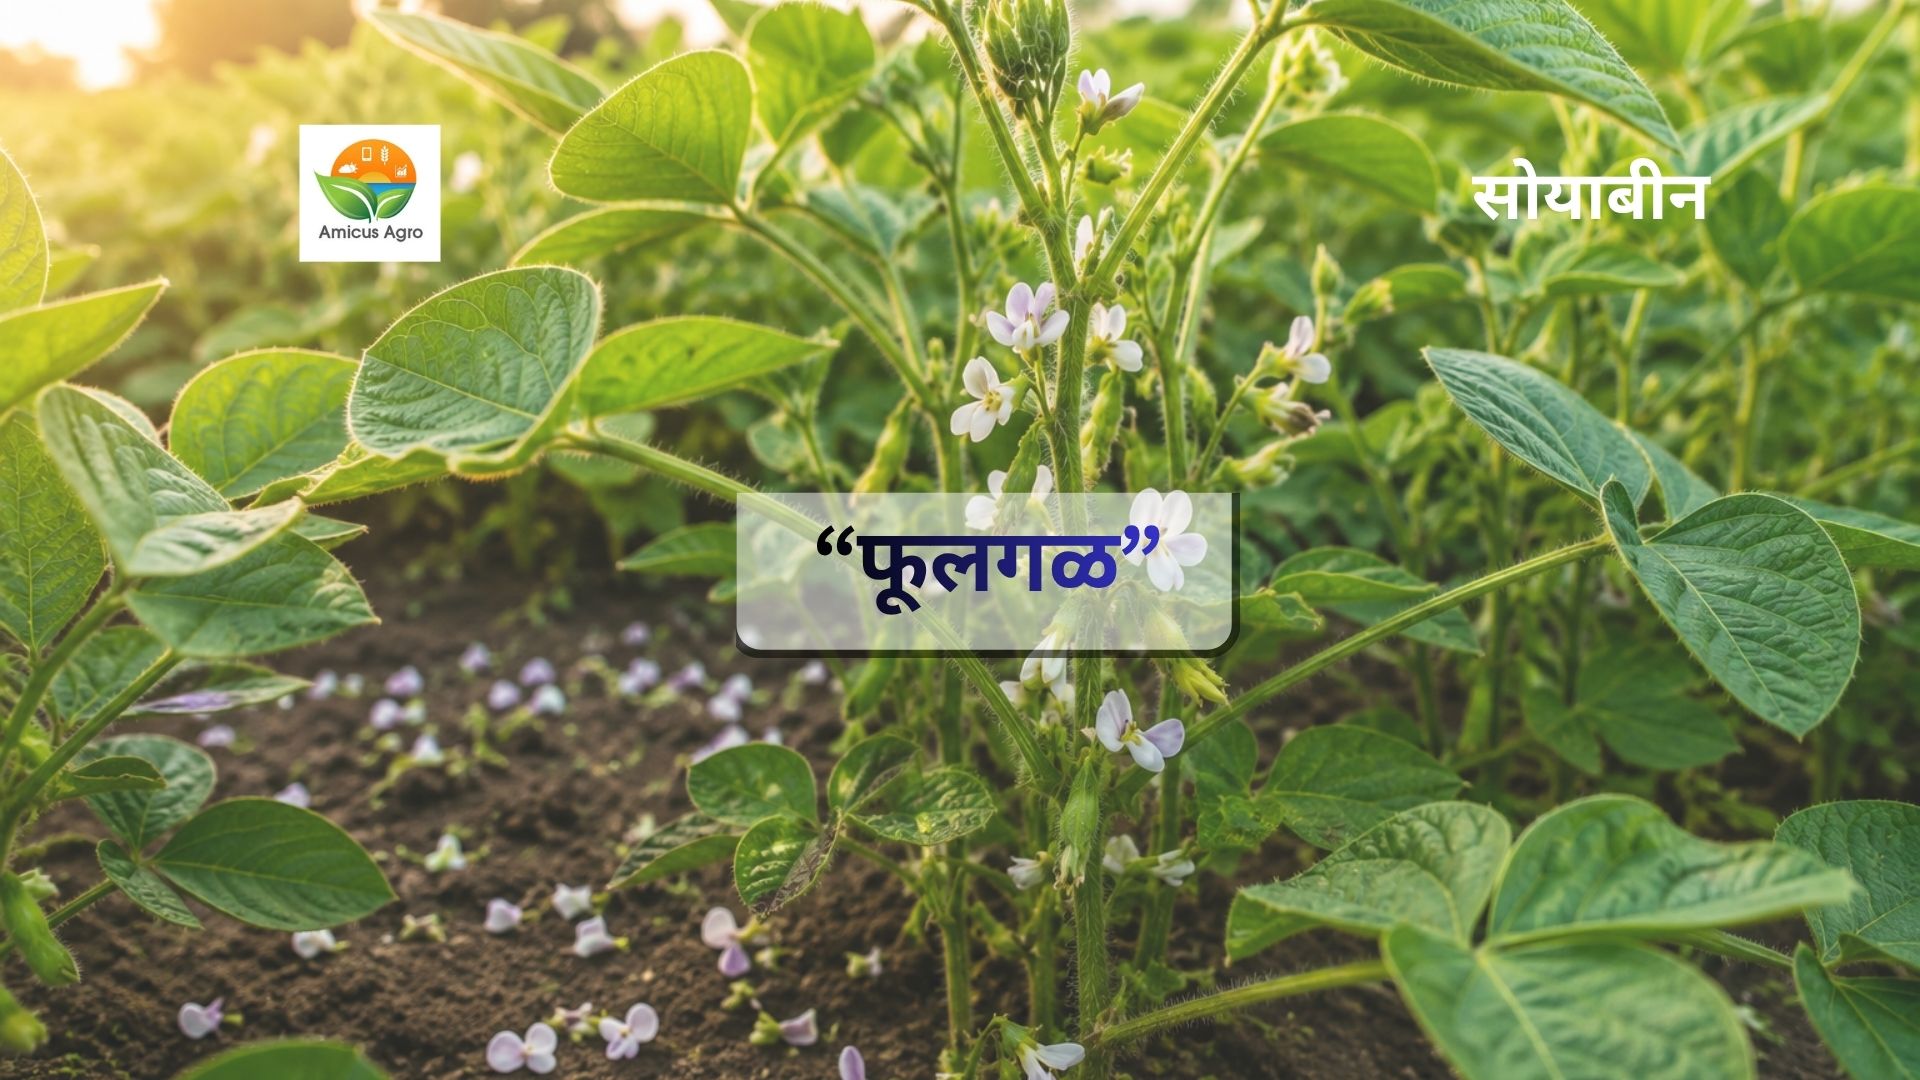
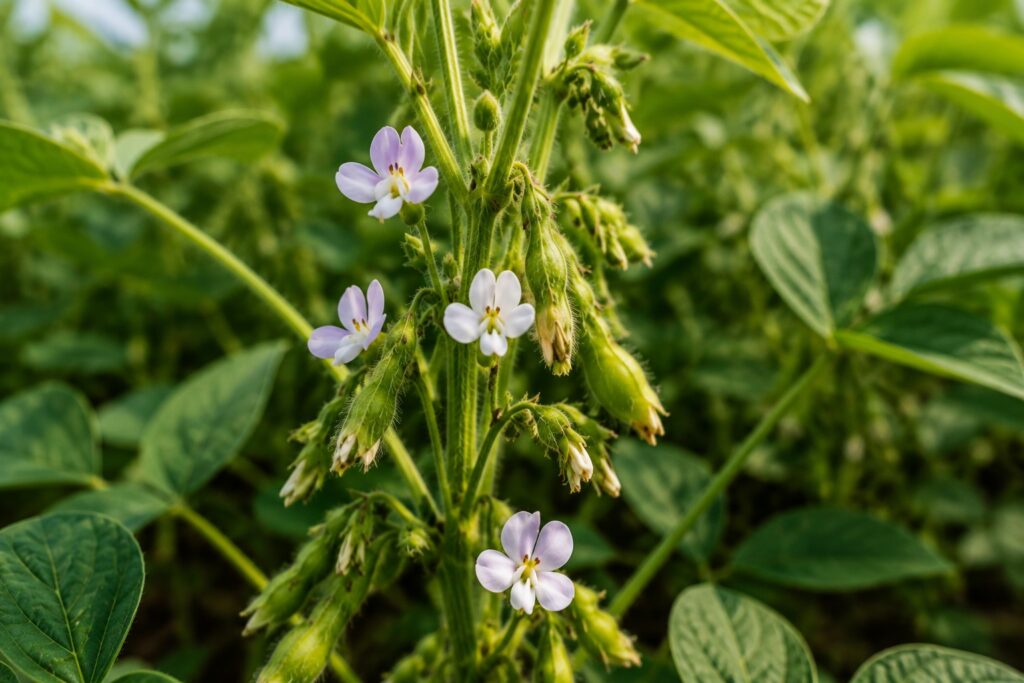
    🌱 सोयाबीन पिकातील फूलगळ वाढतेय? जाणून घ्या कारणे आणि खात्रीशीर उपाय!

    शेतकरी मित्रांनो, सोयाबीन हे आपल्याकडील खरीप हंगामातील एक प्रमुख आणि अत्यंत महत्त्वाचे नगदी पीक आहे. सध्या पीक फुलोऱ्याच्या अवस्थेत असताना अनेक शेतकऱ्यांसमोर एक मोठी समस्या उभी राहिली आहे, ती म्हणजे ‘सोयाबीनची वाढती फूलगळ’.

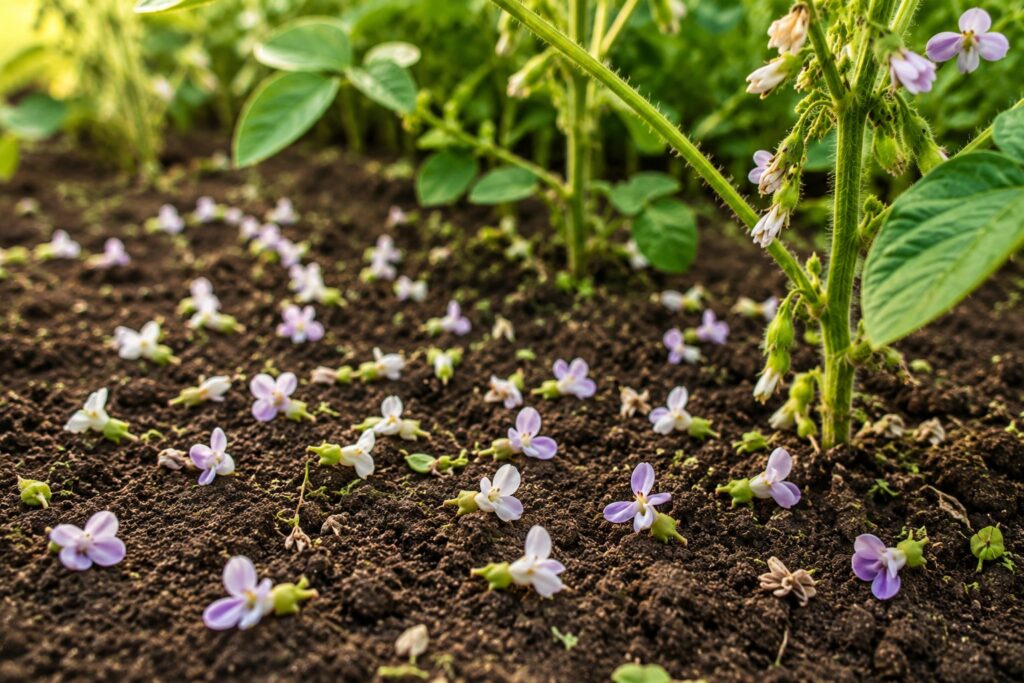
    फुले लागण्याच्या अवस्थेत जर मोठ्या प्रमाणावर फुले गळून पडली, तर फुलांचे रूपांतर शेंगांमध्ये होत नाही आणि पर्यायाने उत्पादनात मोठी घट येते. आजच्या या ब्लॉगमध्ये आपण सोयाबीनची फुले का गळतात? आणि त्यावर काय प्रभावी उपाययोजना केल्या पाहिजेत? याबद्दल सविस्तर माहिती पाहणार आहोत. 🌾

    🔍 सोयाबीनमध्ये फूलगळ होण्याची मुख्य कारणे:

    सोयाबीनची फुले गळण्यामागे अनेक नैसर्गिक आणि व्यवस्थापकीय कारणे असू शकतात. ती खालीलप्रमाणे आहेत:

    • १. पाण्याचा ताण किंवा अति पाणी: पिकाला फुलोऱ्याच्या अवस्थेत पाण्याची सर्वात जास्त गरज असते. यावेळी पावसाचा मोठा खंड पडल्यास (पाण्याचा ताण) किंवा सतत अति पाऊस होऊन शेतात पाणी साचून राहिल्यास मुळांना हवा मिळत नाही, ज्यामुळे फुले गळतात.
    • २. तापमानातील अचानक बदल: दिवसाचे तापमान खूप वाढणे आणि रात्रीचे तापमान कमी होणे, तसेच सततचे ढगाळ वातावरण यामुळे पिकावर ताण येतो आणि फूलगळ होते.
    • ३. अन्नद्रव्यांची कमतरता: पिकाला फुलोऱ्याच्या वेळी अतिरिक्त ऊर्जेची आणि सूक्ष्म अन्नद्रव्यांची (उदा. बोरॉन, झिंक) गरज असते. ही गरज पूर्ण न झाल्यास फुले कमकुवत होऊन गळतात.
    • ४. कीड आणि रोगांचा प्रादुर्भाव: खोडमाशी, उंटअळी किंवा शेंगा पोखरणारी अळी यांसारख्या किडींचा प्रादुर्भाव आणि बुरशीजन्य रोगांमुळेही फुलांचे मोठे नुकसान होते.

    🛠️ फूलगळ थांबवण्यासाठी आवश्यक उपाययोजना

    • 💧 पाणी व्यवस्थापन: पावसाचा ताण असल्यास शक्य असेल तिथे पिकाला संरक्षित पाणी द्यावे. याउलट, शेतात पाणी साचले असल्यास चर खोदून पाण्याचा निचरा करावा.
    • 🛡️ कीड व रोग नियंत्रण: शेताचे नियमित निरीक्षण करा आणि किडींचा प्रादुर्भाव दिसल्यास योग्य कीटकनाशकाची आणि बुरशीनाशकाची फवारणी तज्ञांच्या सल्ल्याने करा.
    • अन्नद्रव्य आणि टॉनिकचा वापर: पिकाला फुलोऱ्याच्या अवस्थेत ताकद देण्यासाठी योग्य ‘एनर्जी बूस्टर’ (Energy Booster) ची फवारणी करणे अत्यंत फायद्याचे ठरते.

    🌟 ॲमिकस कंपनीचे ‘Amicarb’ (ॲमिकार्ब) : फूलगळीवर एक जालीम उपाय

    सोयाबीन पिकाला फुलोऱ्याच्या अवस्थेत येणारा ताण कमी करण्यासाठी आणि फुलांची गळ थांबवण्यासाठी एक प्रभावी उपाय म्हणून तुम्ही ॲमिकस (Amicus) कंपनीचे ‘ॲमिकार्ब’ (Amicarb) या औषधाचा २ मिली प्रति लिटर या प्रमाणात वापर करू शकता. 🧪

    ✨ Amicarb चे फायदे:

    • एनर्जी बूस्टर (Energy Booster): ॲमिकार्ब हे पिकासाठी एक उत्कृष्ट ‘एनर्जी बूस्टर’ म्हणून काम करते. हे पिकाला त्वरित ऊर्जा प्रदान करते, ज्यामुळे पिकाचा नैसर्गिक व वातावरणीय ताण कमी होतो.
    • 🌱 फूलगळ थांबवते: याच्या फवारणीमुळे फुलांचे देठ मजबूत होतात, ज्यामुळे फुलांची गळती त्वरित थांबते.
    • 💰 उत्पादनात वाढ: गळ थांबल्यामुळे जास्तीत जास्त फुलांचे रूपांतर शेंगांमध्ये होते. शेंगांची संख्या आणि दाण्यांचा आकार वाढण्यास मदत होते, ज्यामुळे अंतिम उत्पादनात भरघोस वाढ होते. 📈

    📌 निष्कर्ष:

    शेतकरी बंधूंनो, सोयाबीन पिकातील फूलगळ ही एक गंभीर समस्या असली, तरी योग्य वेळी कारणे ओळखून उपाययोजना केल्यास ती नक्कीच आटोक्यात आणता येते. पिकाचे योग्य व्यवस्थापन आणि ॲमिकार्ब (Amicarb) सारख्या एनर्जी बूस्टरचा वापर करून यावर्षी सोयाबीनचे विक्रमी उत्पादन मिळवा! 🏆

    अधिक माहितीसाठी आणि अशाच शेतीविषयक उपयुक्त लेखांसाठी आमच्या ब्लॉगला नक्की भेट देत राहा. 📲

  • 🌶️मिरचीवर बॅक्टेरियल लीफ स्पॉट (जिवाणूजन्य ठिपके) दिसतोय? घाबरू नका, योग्य कारण ओळखा आणि पिकाचे रक्षण करा!

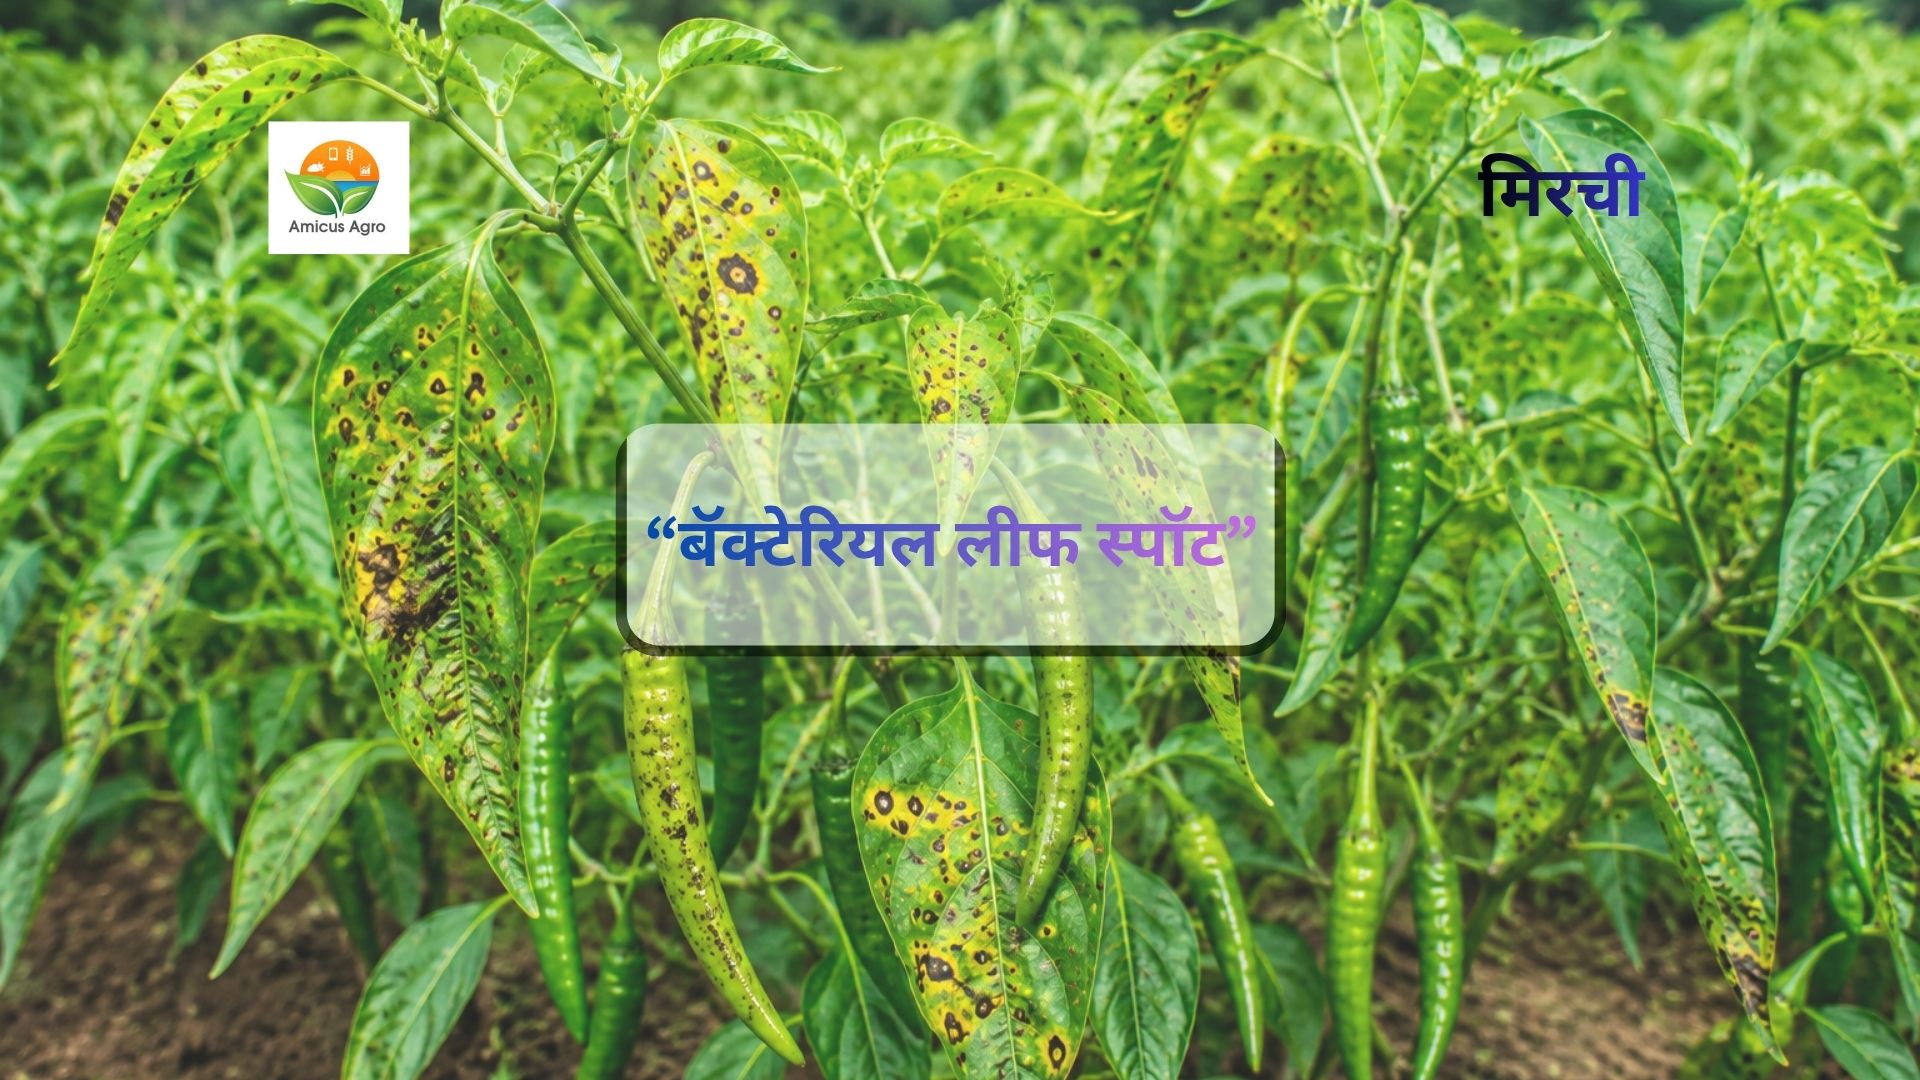
    🌶️मिरचीवर बॅक्टेरियल लीफ स्पॉट (जिवाणूजन्य ठिपके) दिसतोय? घाबरू नका, योग्य कारण ओळखा आणि पिकाचे रक्षण करा!

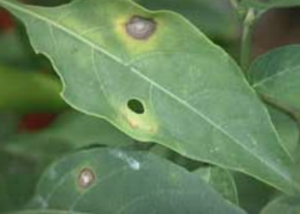
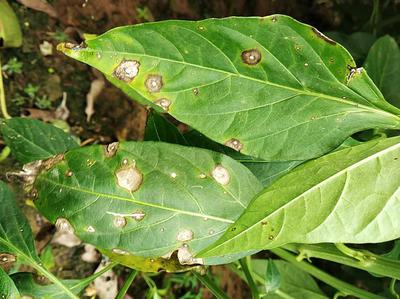
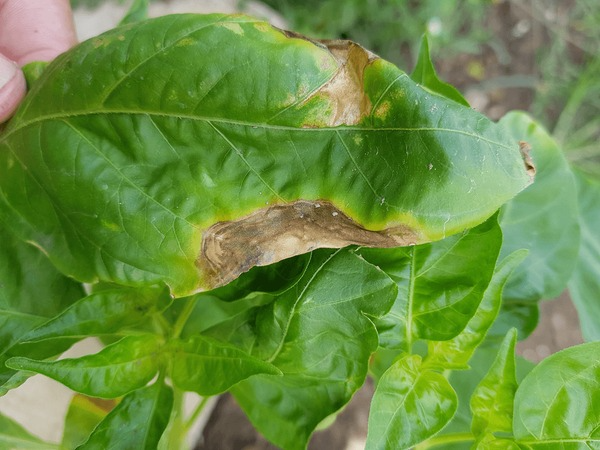
    सध्याची हवामान स्थिती: सतत बदलणारे हवामान, सततची आर्द्रता, दमट हवा आणि ढगाळ वातावरण यामुळे अनेक मिरची पिकांमध्ये बॅक्टेरियल लीफ स्पॉट (जिवाणूजन्य ठिपके) आणि इतर बुरशीजन्य रोगांचा प्रादुर्भाव वेगाने पसरताना दिसत आहे.

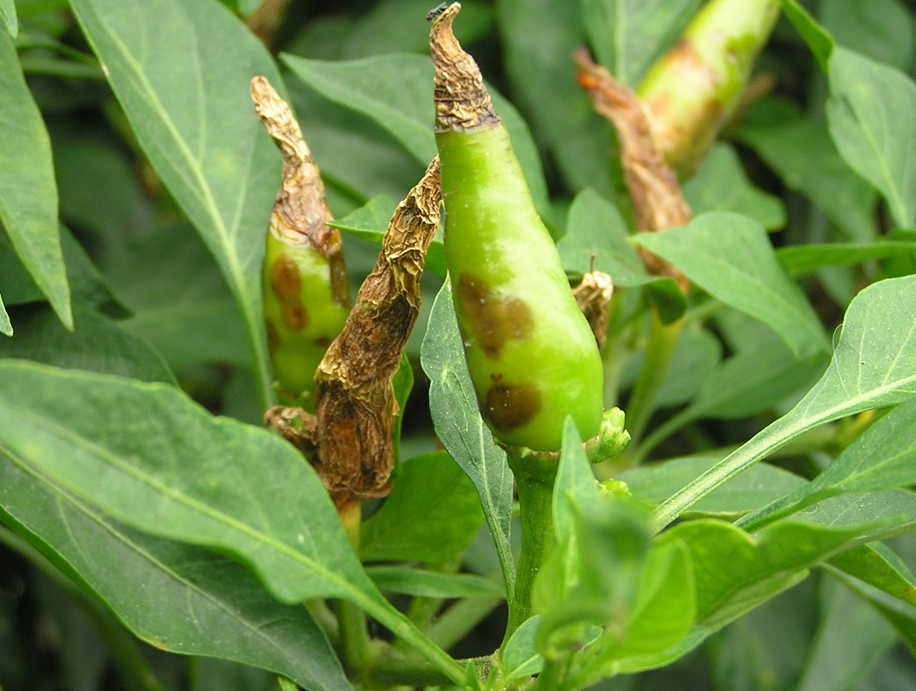
    सुरुवातीला पानांवर किंवा मिरच्यांवर दिसणारे छोटे ठिपके अनेकदा दुर्लक्षित केले जातात. पण वेळेत योग्य उपाय न केल्यास हेच डाग वाढून मिरच्यांची प्रत घसरते, उत्पादन घटते आणि मोठे आर्थिक नुकसान होते.

    🔍 समस्येची प्रमुख ४ कारणे आणि अचूक उपाय

    १. दमट हवामान आणि सततचा पाऊस किंवा आर्द्रता

    सततचे ढगाळ वातावरण, रिमझिम पाऊस आणि उच्च आर्द्रता यामुळे जिवाणूंची वाढ होण्यासाठी अत्यंत अनुकूल परिस्थिती तयार होते.

    उपाय: शेतात किंवा वाफ्यात पाणी साचू देऊ नका. पाण्याचा उत्तम निचरा करा आणि हवामान सुधारताच प्रतिबंधात्मक फवारणीचे नियोजन करा.

    २. पाण्याचे तुषार आणि संसर्ग

    सिंचनाचे पाणी किंवा पावसाचे तुषार एका झाडावरून दुसऱ्या झाडावर उडाल्यामुळे जिवाणू झपाट्याने पसरतात.

    उपाय: शक्यतो तुषार सिंचन टाळून योग्य पद्धतीने पाणी द्या आणि रोगाचा प्रसार रोखण्यासाठी योग्य अंतर ठेवा.

    ३. बागेतील अस्वच्छता आणि यांत्रिक इजा

    मशागतीची कामे करताना किंवा फवारणी करताना झाडांना झालेली इजा आणि शेतात राहिलेले रोगट अवशेष यामुळे रोग पसरतो.

    उपाय: रोगट झालेली पाने आणि शेतातील आधीच्या पिकाचे अवशेष गोळा करून बागेबाहेर नष्ट करा. झाडांना इजा होणार नाही याची काळजी घ्या.

    ४. असंतुलित खत व्यवस्थापन आणि कमकुवत प्रतिकारशक्ती

    नत्राचा (युरिया) अतिवापर केल्यास झाडाची वाढ वेगाने होते पण पेशी कमजोर होतात, ज्यामुळे रोगाचा हल्ला सहज होतो.

    उपाय: नत्राचा अतिवापर टाळा. योग्य अन्नद्रव्य व्यवस्थापन करून झाडाची नैसर्गिक प्रतिकारशक्ती वाढवा.

    🛡️ कठीण प्रसंगी मिरची पिकासाठी ‘संजीवनी’ उपाय: Amicus चे Colicab-Cu!

    जेव्हा पारंपरिक उपायांनी किंवा नेहमीच्या फवारण्यांनी जिवाणूजन्य रोग आटोक्यात येत नाही, तेव्हा मिरची पिकाला रोगाच्या ताणातून बाहेर काढण्यासाठी Amicus कंपनीचे Colicab-Cu तुमच्या पिकासाठी भक्कम ढाल बनून उभे राहते!

    ✨ Amicus चे Colicab-Cu मिरचीसाठी ‘वरदान’ का ठरते?

    • जिवाणू व बुरशीवर दुहेरी हल्ला: Colicab-Cu मधील विशेष तांब्रयुक्त (Copper) नॅनो-फॉर्म्युलेशन जिवाणूजन्य ठिपक्यांचे जिवाणू आणि बुरशीचा प्रसार तात्काळ रोखते.
    • हरितद्रव्य वाढवून नवनिर्मिती: Colicab-Cu मधील घटकांमुळे पानांमधील हरितद्रव्य वेगाने वाढते, ज्यामुळे झाड रोगाच्या ताणातून बाहेर पडून पुन्हा हिरवेगार व टवटवीत होते.
    • रोगप्रतिकारशक्तीत प्रचंड वाढ: झाडाच्या पेशी भिंती मजबूत करून रोगांशी लढण्याची झाडाची नैसर्गिक प्रतिकारशक्ती दुप्पट करते.
    • मिरच्यांची प्रत आणि संरक्षण: मिरच्यांवरिल काळे डाग रोखून मिरच्यांचा रंग, आकार व बाजारभाव उत्तम राखण्यास मदत करते.

    💧 वापराची योग्य पद्धत आणि प्रमाण

    • प्रमाण: २ मि.ली. / ग्रॅम प्रति लिटर पाणी
    • योग्य वेळ: बॅक्टेरियल लीफ स्पॉटची सुरुवातीची लक्षणे दिसताच, अथवा दमट व ढगाळ हवामानात रोगाचा प्रादुर्भाव वाढण्यापूर्वी फवारणी करावी.

    ☀️ फवारणी करताना ‘हे’ सुवर्ण नियम कधीच विसरू नका!

    • फवारणीची योग्य वेळ: फवारणी नेहमी सकाळी ९ वाजेच्या आत किंवा संध्याकाळी ४ नंतरच शांत आणि थंड वातावरणात करा.
    • स्वच्छ पाणी व स्टिकर: फवारणीसाठी नेहमी स्वच्छ पाणी वापरा. औषध पानांवर व मिरच्यांवर व्यवस्थित टिकून राहण्यासाठी चांगल्या दर्जाच्या स्टिकरचा (Spreader) वापर नक्की करा.
    • हवामानाचा अंदाज: कडक ऊन किंवा पाऊस चालू असताना फवारणी करणे टाळा.

    🏁 निष्कर्ष

    माझ्या शेतकरी बंधूंनो, मिरची पिकवणे ही कष्टाची मेहनत असते. बॅक्टेरियल लीफ स्पॉट आला म्हणून खचून जाऊ नका किंवा घाबरू नका. आधी योग्य कारण ओळखा, शेताची स्वच्छता ठेवा आणि Amicus च्या Colicab-Cu चा योग्य वेळी वापर करून आपले मिरची पीक हिरवेगार, दमदार अन् रोगमुक्त ठेवा!

    💬 तुमच्या मिरची पिकाची सध्याची स्थिती कशी आहे? मनात काही शंका असल्यास कमेंटमध्ये नक्की विचारा!

    📢 आणि हा लेख आपल्या प्रत्येक शेतकरी भावापर्यंत नक्की Share करा, जेणेकरून कोणाचेही नुकसान होणार नाही!

  • 🌼 उडीद पिकात फूलगळ वाढतेय? ‘या’ अचूक उपायाने फुलांचे संरक्षण करा आणि उत्पादन वाढवा! 🚀

    🌼 उडीद पिकात फूलगळ वाढतेय? ‘या’ अचूक उपायाने फुलांचे संरक्षण करा आणि उत्पादन वाढवा! 🚀

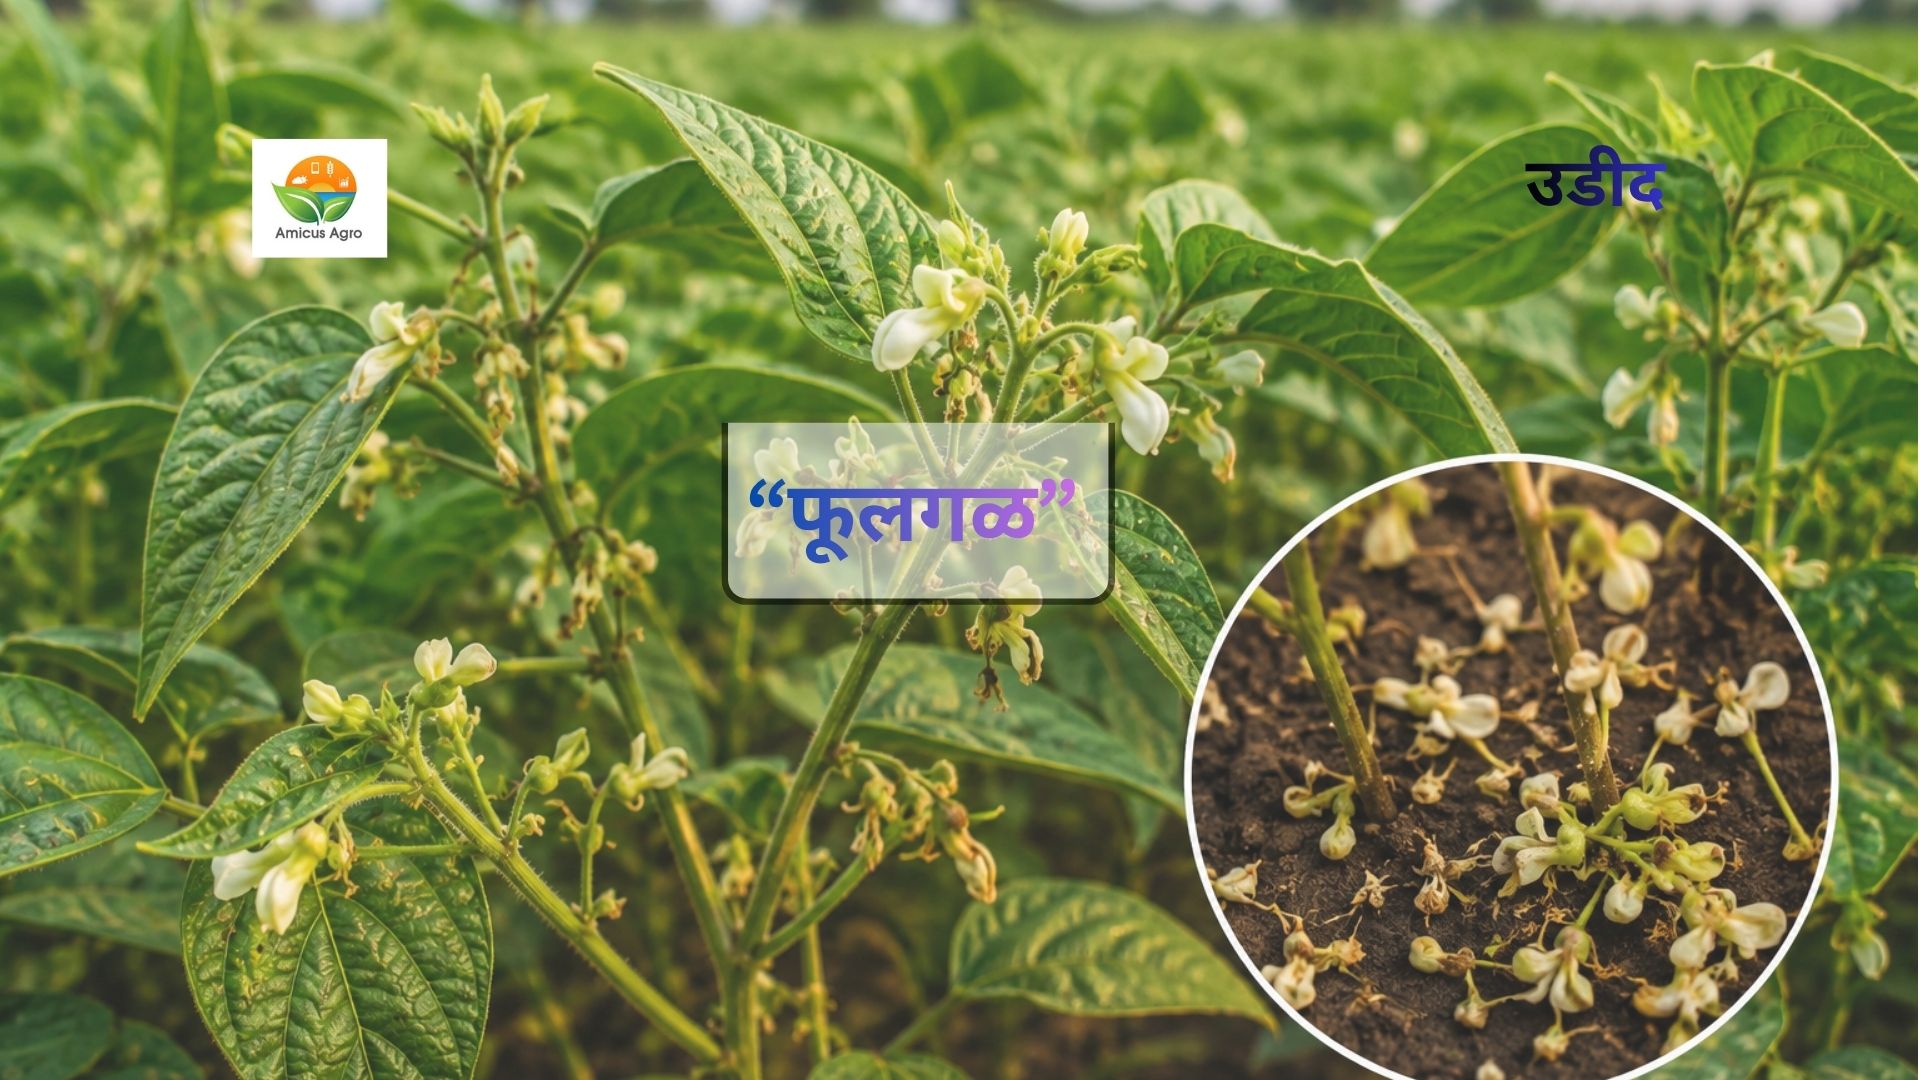
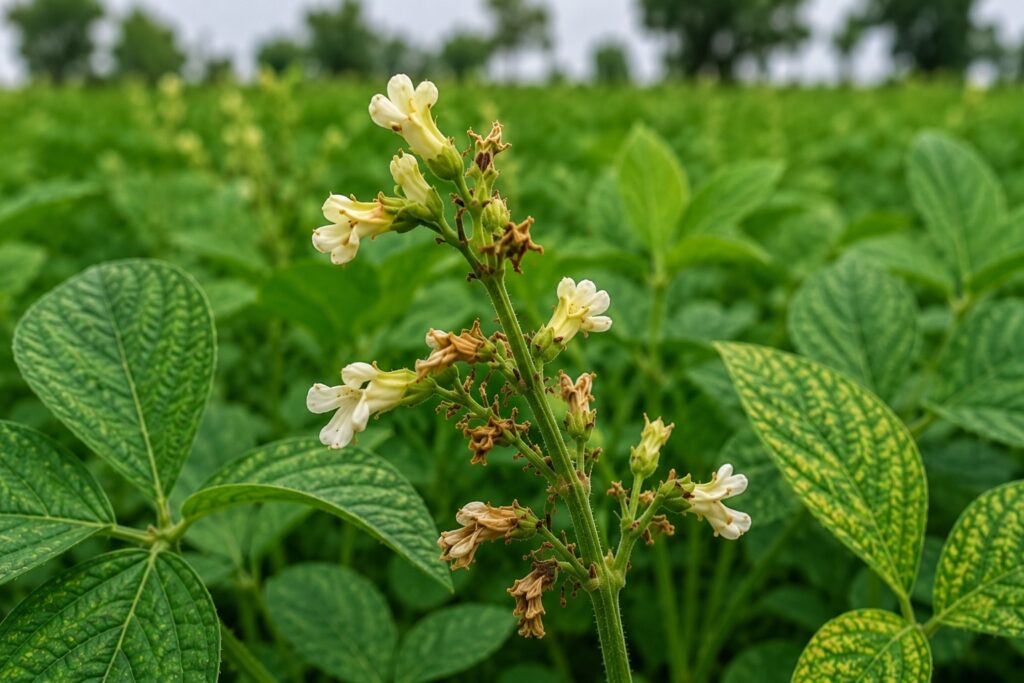
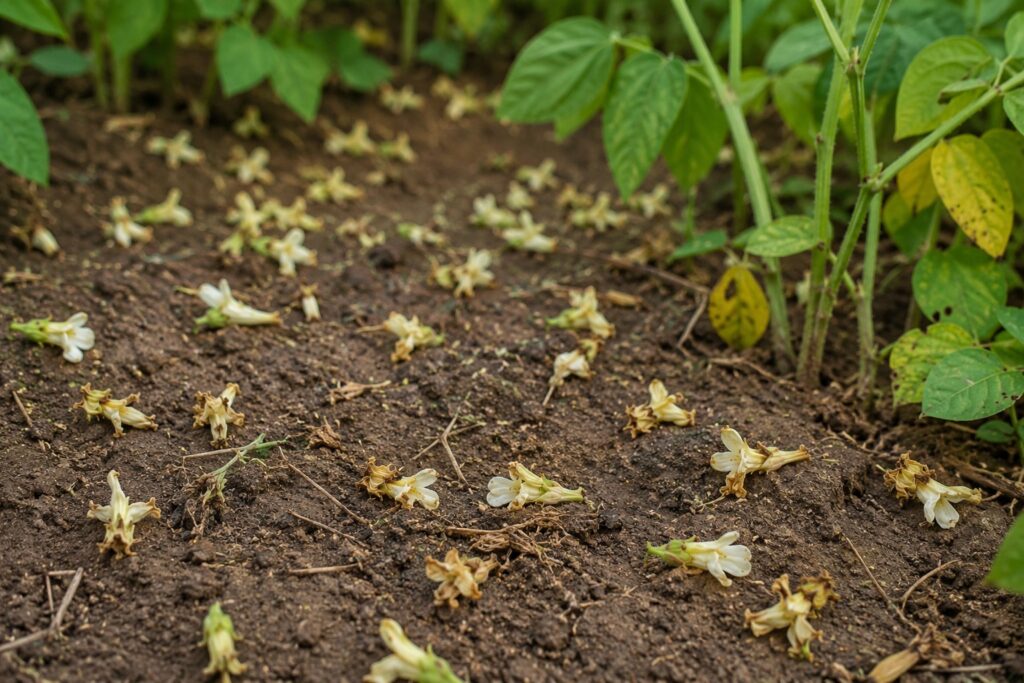
    उडीद हे खरीप हंगामातील अत्यंत महत्त्वाचे कडधान्य पीक आहे. 🌾 सध्या सतत बदलणारे हवामान, अधूनमधून पडणारा पाऊस, वाढलेली आर्द्रता आणि वातावरणातील ताण यामुळे अनेक शेतांमध्ये फूलगळ (Flower Drop) होण्याची समस्या गंभीर रूप धारण करताना दिसत आहे.

    समस्या वेळीच ओळखून योग्य व्यवस्थापन करणे अत्यंत गरजेचे आहे!

    🌱 उडीद पिकात फूलगळ होण्याची प्रमुख कारणे:

    • १️⃣ बदलते हवामान: 🌧️ सततचा पाऊस, ढगाळ वातावरण किंवा अचानक वाढलेले तापमान यामुळे परागीभवनावर (Pollination) प्रतिकूल परिणाम होतो आणि फुले गळू लागतात.
    • २️⃣ रोगांचा वाढता प्रादुर्भाव: 🦠 जास्त आर्द्रतेमुळे बुरशीजन्य व जिवाणूजन्य रोगांचा प्रादुर्भाव वाढतो. त्यामुळे झाडावर ताण येतो आणि फुले टिकत नाहीत.
    • ३️⃣ पिकावरील जैविक ताण (Stress): 💧 जमिनीत पाणी साचणे, अन्नद्रव्यांचे असंतुलन किंवा हवामानातील चढ-उतार यामुळे झाडाची प्रतिकारशक्ती कमी होते.
    • ४️⃣ अन्नद्रव्यांची कमतरता: 🌿 फुलोऱ्याच्या अवस्थेत आवश्यक अन्नद्रव्यांची कमतरता असल्यास फुले कमकुवत राहतात आणि झपाट्याने गळतात.

    ⚠️ फूलगळ वाढल्याची स्पष्ट लक्षणे:

    • 🌼 उमललेली फुले मोठ्या प्रमाणात जमिनीवर किंवा पानांवर गळतात.
    • 🌿 झाडाला फुले असूनही प्रत्यक्षात शेंगा खूप कमी लागतात.
    • 🌱 पिकाची एकूण वाढ मंदावते.
    • 📉 हंगामाच्या शेवटी उत्पादनात लक्षणीय घट होऊ शकते.

    🛡️ फूलगळ रोखण्यासाठी आणि फळधारणा सुधारण्यासाठी अत्यंत सोपा आणि प्रभावी उपाय!

    पिकाची होणारी फूलगळ थांबवून जास्तीत जास्त शेंगा टिकवून धरण्यासाठी आणि दर्जेदार उत्पादनासाठी अल्फा नॅप्थिल ॲसिटिक ॲसिड (NAA) चा वापर अत्यंत फायदेशीर ठरतो:

    • ✅ अचूक शिफारस केलेले प्रमाण: अल्फा नॅप्थिल ॲसिटिक ॲसिड (NAA) ४.५% एसएल (०.२५ मि.ली. प्रति लिटर पाणी) या प्रमाणात घेऊन, त्यामध्ये विद्रव्य खत (१९:१९:१९) (५ ग्रॅम प्रति लिटर पाणी) उत्तम प्रकारे मिसळून पानांवर व्यवस्थित फवारणी करावी. 🧪
    • 🌟 शेतकऱ्यांना होणारा फायदा: यामुळे झाडाची कळ्या व फुले गळण्याची समस्या दूर होते, परागीभवन उत्तम प्रकारे होऊन झाडाला जास्तीत जास्त शेंगा लागण्यास आणि उत्पादनात भरघोस वाढ होण्यास मोठी मदत मिळते! 📈

    फुलोऱ्याच्या काळात पिकाला द्या AMICARB ची ताकद!

    उडीद पिकाला कठीण हवामानात ताकद देण्यासाठी आणि वेगळ्या संकटांवर मात करण्यासाठी AMICARB एक ‘संजीवनी’ म्हणून काम करते:

    • ✨ पिकात पुन्हा हिरवा प्राण आणते: पानांमधील हरितद्रव्य (Chlorophyll) वेगाने वाढवून अन्न तयार करण्याची प्रक्रिया सुरू करते, ज्यामुळे पीक टवटवीत राहते. 🌿
    • 💪 मुळांना देते ताकद: झाडाची मुळे खोलवर मजबूत करून जमिनीतील अन्न शोषून घेण्याची क्षमता वाढवते. 🌳
    • 🛡️ रोगांशी लढण्याची ताकद देते: पिकाची रोगप्रतिकारशक्ती झपाट्याने वाढवते. 🛡️

    💧 वापराची योग्य पद्धत आणि अचूक वेळ:

    • 📏 प्रमाण: २ ग्रॅम प्रति लिटर पाणी (एकरी अंदाजे ७०० ते ८०० ग्रॅम). ⚖️
    • ⏰ योग्य वेळ (फवारणी कधी करावी?):
      • पिकावर रोगाची सुरुवातीची लक्षणे दिसताच किंवा सततच्या पावसाळी व दमट हवामानामुळे फूलगळ सुरू होण्याच्या काळात ही फवारणी करावी. 🌦️
      • प्रादुर्भाव वाढण्यापूर्वी प्रतिबंधात्मक उपाय (Preventive Spray) म्हणून फवारणी केल्यास पिकाचे १००% संरक्षण होते. ✅

    ☀️ फवारणी करताना घ्यावयाची महत्त्वाची काळजी:

    • ✔️ नेहमी सकाळच्या किंवा संध्याकाळच्या थंड वातावरणातच फवारणी करावी. 🌅
    • ✔️ फवारणीसाठी नेहमी स्वच्छ पाण्याचा वापर करावा. 💧
    • ✔️ औषध पानांवर व फुलांवर व्यवस्थित टिकून राहण्यासाठी चांगल्या दर्जाच्या स्टीकरचा (Spreader) वापर नक्की करावा. ✨

    📌 निष्कर्ष:

    उडीद पिकातील फूलगळ ही थेट उत्पादनावर घाव घालणारी समस्या आहे. 📉 बदलते हवामान, वाढलेली आर्द्रता आणि रोगांचा ताण यामुळे ही समस्या अधिक वाढू शकते. अशा कठीण प्रसंगी योग्य पीक व्यवस्थापनासोबत अल्फा नॅप्थिल ॲसिटिक ॲसिड (NAA) आणि AMICARB चा शिफारशीनुसार वापर केल्यास पिकाची प्रतिकारशक्ती वाढण्यास, फुलांचे रक्षण होण्यास आणि निरोगी वाढीस उत्तम मदत मिळू शकते.
  • हळद व आल्यावर मुळकुज-खोडकुज दिसत्येय? घाबरू नका! योग्य कारण ओळखा आणि पिकाचे रक्षण करा!

    हळद व आल्यावर मुळकुज-खोडकुज दिसत्येय? घाबरू नका! योग्य कारण ओळखा आणि पिकाचे रक्षण करा!

    🛑 हळद व आल्यावर मुळकुज-खोडकुज दिसत्येय? घाबरू नका! योग्य कारण ओळखा आणि पिकाचे रक्षण करा!

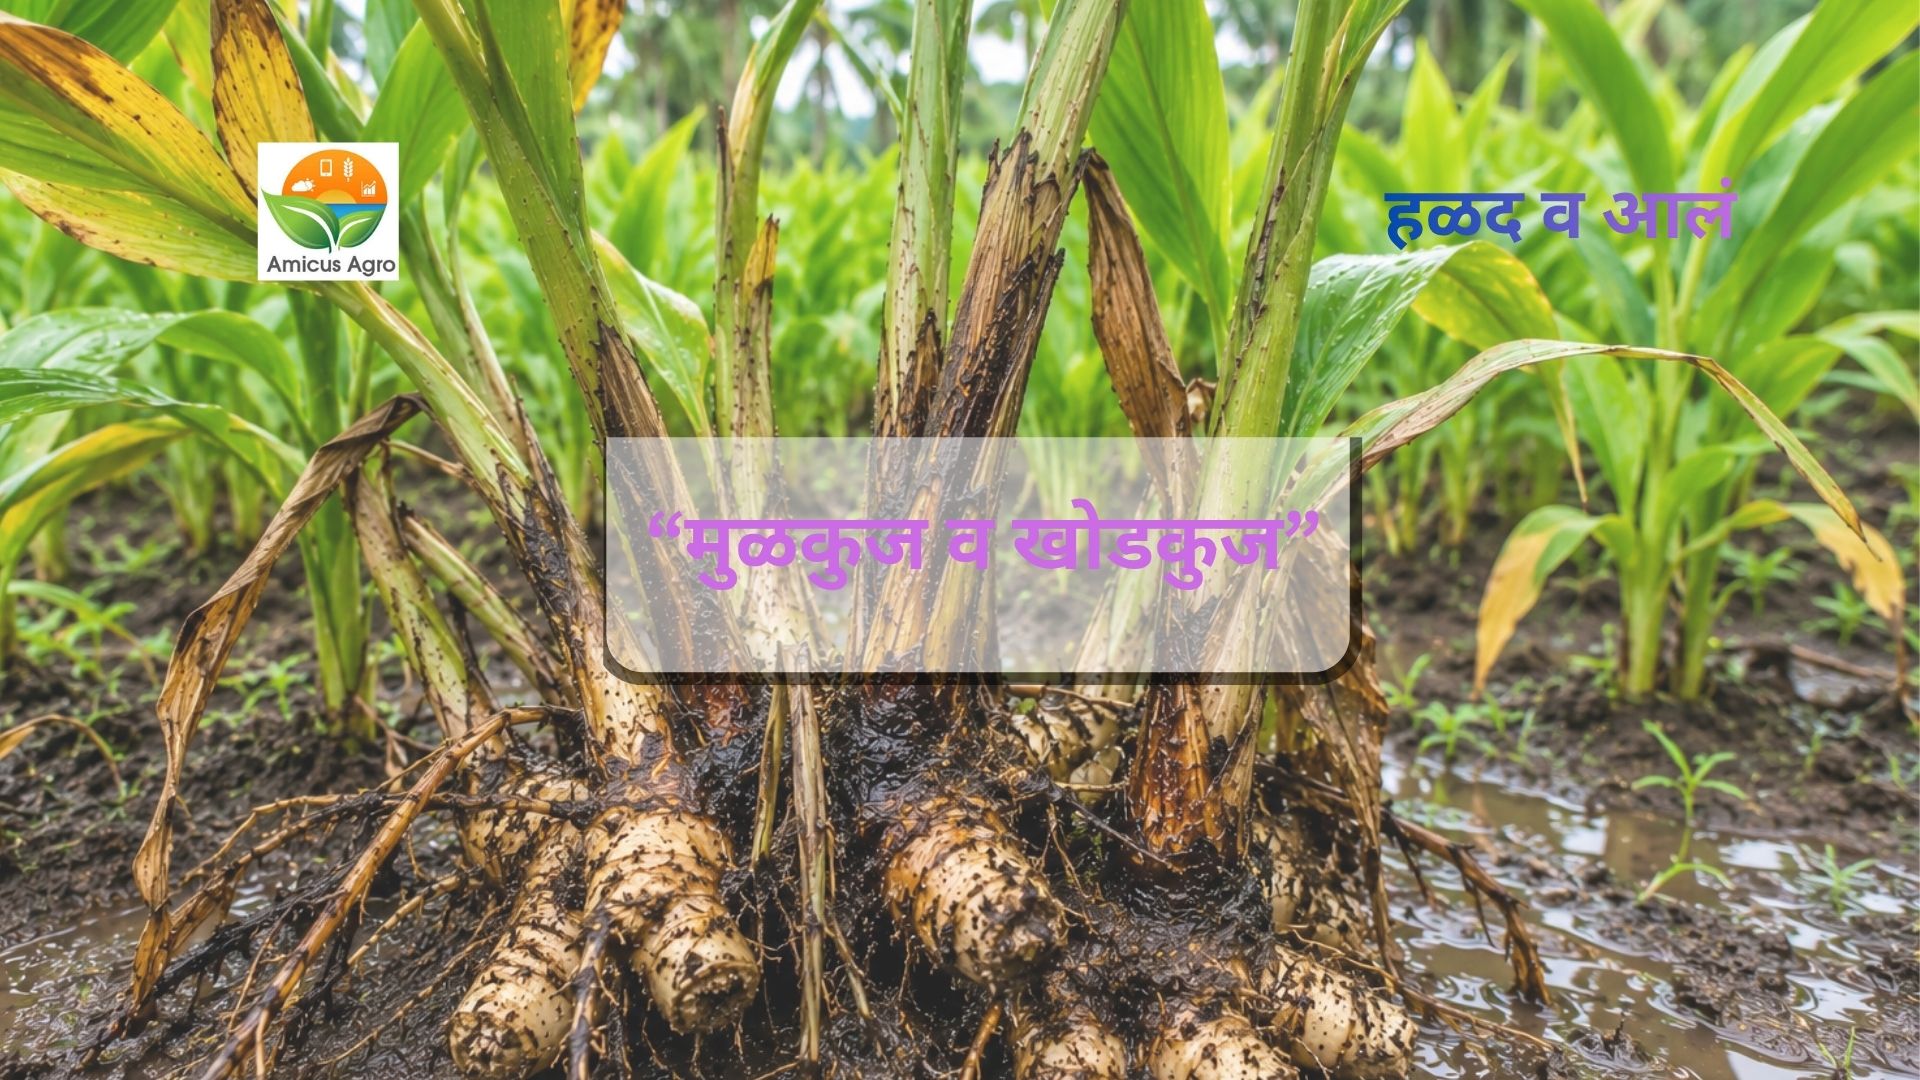
    महाराष्ट्रात हळद आणि आले ही शेतकऱ्यांची प्रमुख व महत्त्वाचे उत्पन्न देणारी नगदी पिके आहेत. मात्र, गेल्या काही दिवसांपासून सुरू असलेल्या सततच्या पावसाने अनेक भागांत शेतांमध्ये पाणी साचले आहे. जमिनीत जास्त काळ पाणी साचून राहिल्यामुळे आर्द्रतेचे प्रमाण वाढते आणि कंदवर्गीय पिकांवर ‘मुळकुज’ व ‘खोडकुज’ (Rhizome Rot) या घातक रोगाचा प्रादुर्भाव वेगाने वाढू लागतो.

    हा रोग वेळेवर नियंत्रणात न आणल्यास संपूर्ण पीक पाहता पाहता वाया जाऊ शकते. त्यामुळे या रोगाची लक्षणे ओळखून वेळीच अचूक उपाययोजना करणे अत्यंत गरजेचे आहे!

    🔍 मुळकुज आणि खोडकुजेची ४ प्रमुख लक्षणे

    शेतात मुळकुज किंवा खोडकुज झाली आहे की नाही, हे कसे ओळखायचे?

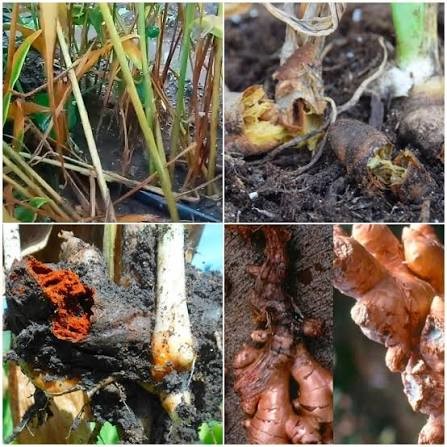
    1. पाने पिवळी पडणे: झाडाची खालची किंवा शेंड्याकडील पाने हळूहळू पिवळी पडू लागतात. नंतर हा पिवळसरपणा पूर्ण पानावर पसरतो आणि पानांच्या कडा वाळू लागतात.
    2. खोडावर परिणाम: जमिनीलगतचा खोडाचा भाग काळपट रंगाचा पडतो आणि मऊ होतो.
    3. कंद कुजणे: झाडाखालील माती बाजूला करून पाहिल्यास, कंद काळा व निस्तेज झालेला दिसतो. कंद दाबल्यास त्यातून दुर्गंधीयुक्त, कुजलेले पाणी बाहेर येते.
    4. जिवाणूंचा दुय्यम प्रादुर्भाव: बुरशीजन्य प्रादुर्भाव झाल्यावर त्यावर जिवाणू (Bacteria) देखील हल्ला करतात, ज्यामुळे कंद कुजण्याची प्रक्रिया अतिशय वेगाने घडते.

    🛡 रोगावर प्रभावी नियंत्रण आणि उपाययोजना

    हा रोग पसरण्यापासून रोखण्यासाठी खालील steps ताबडतोब उचला:

    १. शेताची पाहणी व रोगग्रस्त झाडे नष्ट करणे

    • शेतात फिरून रोगग्रस्त झाडे मुळासकट उपटून काढा.
    • ही झाडे शेताबाहेर नेऊन खोल खड्ड्यात गाडून टाका किंवा जाळून नष्ट करा, जेणेकरून संसर्ग इतर चांगल्या झाडांपर्यंत पसरणार नाही.

    २. पाण्याचा उत्तम निचरा करणे

    • साचलेले पाणी शेतातून बाहेर काढण्यासाठी तात्काळ चर (Drainage channels) आखा.
    • जमिनीत हवा खेळती राहणे आणि अतिरिक्त पाण्याचा निचरा होणे अत्यंत आवश्यक आहे.

    🛡 कठीण प्रसंगी हळद व आल्यासाठी ‘संजीवनी’ उपाय: SILLER-100!

    जेव्हा मुळकुज आणि खोडकुजेचा प्रादुर्भाव वाढतो, तेव्हा सामान्य उपचारांपेक्षा SILLER-100 पिकाला रोगाच्या ताणातून बाहेर काढण्यासाठी अत्यंत भक्कम ढाल बनून उभे राहते!

     SILLER-100 मुळकुज व खोडकुजेवर ‘वरदान’ का ठरते?

    • 🦠 जिवाणू व बुरशीवर दुहेरी हल्ला: SILLER-100 मधील विशेष नॅनो-फॉर्म्युलेशन मुळकुज आणणाऱ्या बुरशीचा आणि जिवाणूंचा प्रसार तात्काळ रोखते.
    • 🌿 पांढऱ्या मुळांची निर्मिती: रोगाने बाधित झालेल्या मुळांना पुनरुज्जीवित करून नवीन सशक्त पांढऱ्या मुळांची (Feeder roots) वाढ वेगाने करते.
    • 🛡️ रोगप्रतिकारशक्तीत प्रचंड वाढ: झाडाच्या पेशीभिंती मजबूत करून रोगांशी लढण्याची पिकाची नैसर्गिक क्षमता दुप्पट करते.
    • 🧪 कंदाची गुणवत्ता व विकास: जमिनीतील अन्नद्रव्ये शोषून घेण्याची क्षमता वाढवून कंद कुजण्यापासून वाचवते व कंदाचा आकार व वजन उत्तम ठेवते.

    💧 वापराची योग्य पद्धत आणि प्रमाण (आळवणी / Drenching)

    • प्रमाण: २ ते २.५ मि.ली. प्रति लिटर पाणी (किंवा १ लिटर प्रति एकरी ड्रिपद्वारे / आळवणीसाठी).
    • योग्य वेळ: मुळकुजीची किंवा खोडकुजीची सुरुवातीची लक्षणे दिसताच, अथवा पावसाळी हवामानात रोगाचा प्रादुर्भाव वाढण्यापूर्वी ड्रिपद्वारे किंवा आळवणी (Drenching) करावी.
    • इतर औषधांसोबत: कॉपर ऑक्सिक्लोराईड (५ ग्रॅम/लिटर) सोबत किंवा SILLER-100 ची स्वतंत्र आळवणी केल्यास अत्यंत उत्तम परिणाम मिळतात.

    💡 आळवणी करताना ‘हे’ सुवर्ण नियम लक्षात ठेवा!

    1. 🌦️ हवामानाचा अंदाज: पावसाचा अंदाज घेऊनच आळवणीचे नियोजन करा.
    2. 💧 जमिनीतील ओलावा: आळवणी करताना जमिनीमध्ये पुरेसा ओलावा असावा, पण शेतात पाणी साचलेले नसावे.

    🤝 निष्कर्ष

    शेतकरी बंधूंनो, हळद आणि आल्याची शेती ही तुमची वर्षाभराची मेहनत असते. मुळकुज किंवा खोडकुज आली म्हणून खचून जाऊ नका. सुरुवातीलाच लक्षणे ओळखा, शेताची स्वच्छता ठेवा, पाण्याचा निचरा करा आणि SILLER-100 चा योग्य वेळी वापर करून आपले पीक सुरक्षित व रोगमुक्त ठेवा!

    💬 तुमच्या हळद किंवा आल्याच्या पिकाची सध्याची स्थिती कशी आहे? काही शंका असल्यास कमेंटमध्ये नक्की विचारा!

    📲 हा लेख आपल्या इतर हळद व आले उत्पादक शेतकरी भावांपर्यंत नक्की Share करा, जेणेकरून कोणाचेही नुकसान होणार नाही!

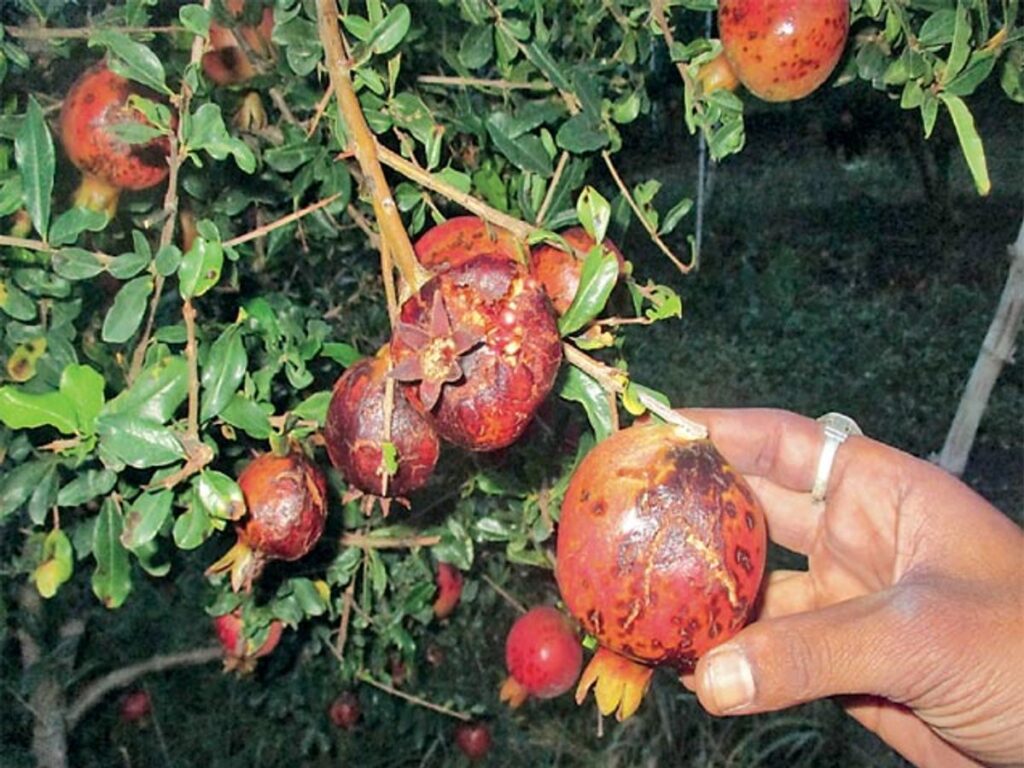
  • डाळिंबावर तेलकट अन् कुजवा दिसतोय? घाबरू नका, योग्य कारण ओळखा आणि बागेचे रक्षण करा!

    डाळिंबावर तेलकट अन् कुजवा दिसतोय? घाबरू नका, योग्य कारण ओळखा आणि बागेचे रक्षण करा!

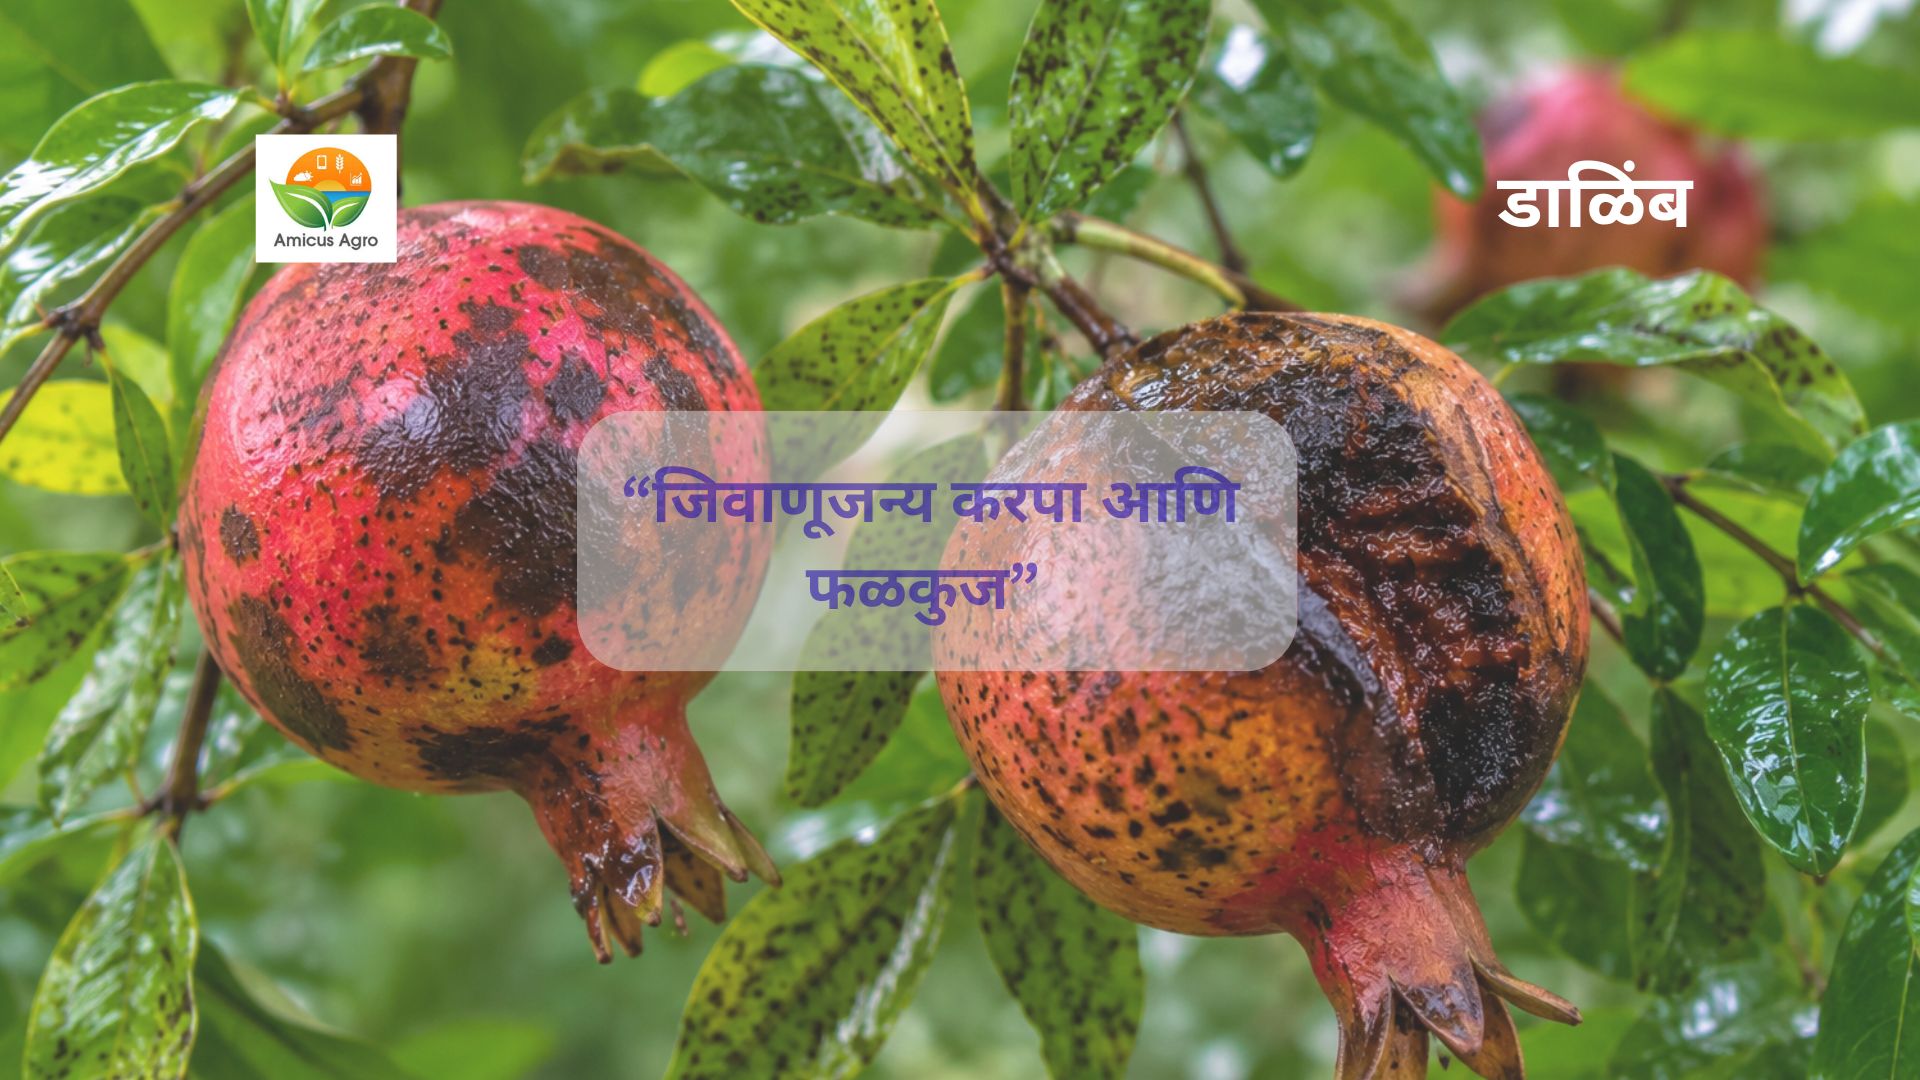
    सध्या सतत बदलणारे हवामान, अधूनमधून पडणारा पाऊस, हवामानातील जास्त आर्द्रता आणि उष्ण वातावरण यामुळे अनेक डाळिंब बागांमध्ये तेलकट रोग (Bacterial Blight) आणि फळकूज (Fruit Rot / Anthracnose) वेगाने वाढताना दिसत आहे.

    सुरुवातीला पानांवर किंवा फळांवर दिसणारे छोटे काळसर डाग अनेकदा दुर्लक्षित केले जातात. पण वेळेत योग्य उपाय न केल्यास हेच डाग वाढून फळांची गुणवत्ता घसरते, उत्पादन घटते आणि मोठे आर्थिक नुकसान होते.

    🔍 समस्येची प्रमुख ४ कारणे आणि अचूक उपाय

    १. दमट हवामान आणि सततचा पाऊस

    पावसाळ्यात हवामानातील जास्त आर्द्रता आणि साचलेले पाणी यामुळे जिवाणू व बुरशीचा प्रसार अत्यंत वेगाने होतो.

    • उपाय: बागेत पाणी साचणार नाही याची दक्षता घ्या. पाण्याचा उत्तम निचरा करा आणि पाऊस उघडताच फवारणीचे नियोजन करा.

    २. झाडांमधील हवा आणि सूर्यप्रकाशाची कमतरता

    झाडांची दाटी जास्त असल्यास सूर्यप्रकाश आतपर्यंत पोहोचत नाही, ज्यामुळे रोगाचे जंतू वेगाने वाढतात.

    • उपाय: छाटणी करताना झाडात हवा आणि सूर्यप्रकाश खेळता राहील अशा प्रकारे अतिरिक्त, रोगट फांद्या काढून टाका.

    ३. दूषित अवजारे आणि बागेतील अस्वच्छता

    रोगट फांद्या किंवा गळलेली फळे बागेत तशीच राहिल्यास आणि छाटणीची कात्री न धुता वापरल्यास रोग एका झाडावरून दुसऱ्या झाडावर पसरतो.

    • उपाय: छाटणी करताना कात्री/सिकेचर दर काही झाडांनंतर डिटॉलच्या पाण्याने साफ करा. रोगट पाने, फांद्या आणि गळलेली फळे गोळा करून बागेबाहेर नेऊन नष्ट (जाळून) करा.

    ४. असंतुलित खत व्यवस्थापन आणि कमकुवत प्रतिकारशक्ती

    नत्राचा (युरिया) अतिवापर केल्यास झाडाची त्वचा मऊ पडते आणि रोगाचा हल्ला सहज होतो.

    • उपाय: नत्राचा अतिवापर टाळा. स्फुरद, पालाश, कॅल्शियम आणि सूक्ष्मअन्नद्रव्यांचा योग्य वापर करून झाडाची प्रतिकारशक्ती वाढवा.

    🛡️ कठीण प्रसंगी डाळिंब बागेसाठी ‘संजीवनी’ उपाय: Amicus चे Colicab-Cu!

    जेव्हा पारंपरिक उपायांनी किंवा नेहमीच्या फवारण्यांनी रोग आटोक्यात येत नाही, तेव्हा डाळिंब बागेला रोगाच्या ताणातून बाहेर काढण्यासाठी Amicus कंपनीचे Colicab-Cu तुमच्या बागेसाठी भक्कम ढाल बनून उभे राहते!

     Amicus चे Colicab-Cu डाळिंबासाठी ‘वरदान’ का ठरते?

    • जिवाणू व बुरशीवर दुहेरी हल्ला: Colicab-Cu मधील विशेष तांब्रयुक्त (Copper) नॅनो-फॉर्म्युलेशन तेलकट रोगाचे जिवाणू आणि कुजवा आणणाऱ्या बुरशीचा प्रसार तात्काळ रोखते.
    • हरितद्रव्य वाढवून नवनिर्मिती: Colicab-Cu मधील घटकांमुळे पानांमधील हरितद्रव्य वेगाने वाढते, ज्यामुळे झाड रोगाच्या ताणातून बाहेर पडून पुन्हा हिरवेगार व टवटवीत होते.
    • रोगप्रतिकारशक्तीत प्रचंड वाढ: झाडाच्या पेशी भिंती मजबूत करून रोगांशी लढण्याची झाडाची नैसर्गिक प्रतिकारशक्ती दुप्पट करते.
    • मुळांची ताकद आणि फळांची प्रत: झाडाची मुळे सक्षम करून जमिनीतील अन्नद्रव्ये शोषून घेण्याची क्षमता वाढवते, ज्यामुळे नवीन फळांवर डाग पडत नाहीत आणि फळांचा रंग, आकार व गुणवत्ता उत्तम राहते.

    💧 वापराची योग्य पद्धत आणि प्रमाण

    • प्रमाण: २ मि.ली. / ग्रॅम प्रति लिटर पाणी (एकरी अंदाजे ५०० ते ७०० मि.ली. / ग्रॅम पाण्याच्या प्रमाणानुसार).
    • योग्य वेळ: तेल्या किंवा कुजव्याची सुरुवातीची लक्षणे दिसताच, अथवा पावसाळी हवामानात रोगाचा प्रादुर्भाव वाढण्यापूर्वी फवारणी करावी.
    • खोडाला पेस्ट: छाटणीनंतर झाडाच्या खोडाला व उघड्या भागावर योग्य बोर्डो/कॉपर पेस्ट नक्की लावावी.

    फवारणी करताना ‘हे’ सुवर्ण नियम कधीच विसरू नका!

    1. फवारणीची योग्य वेळ: फवारणी नेहमी सकाळी ९ वाजेच्या आत किंवा संध्याकाळी ४ नंतरच शांत आणि थंड वातावरणात करा.
    2. स्वच्छ पाणी व स्टिकर: फवारणीसाठी नेहमी स्वच्छ पाणी वापरा. औषध पानांवर व फळांवर व्यवस्थित टिकून राहण्यासाठी चांगल्या दर्जाच्या स्टिकरचा (Spreader) वापर नक्की करा.
    3. हवामानाचा अंदाज: कडक ऊन किंवा पाऊस चालू असताना फवारणी करणे टाळा.

    🤝 निष्कर्ष

    माझ्या डाळिंब उत्पादक शेतकरी भावांनो, डाळिंब बाग फुलवणे ही वर्षाभराची मेहनत असते. तेल्या किंवा कुजवा आला म्हणून खचून जाऊ नका किंवा घाबरून चुकीच्या औषधांवर नाहक खर्च करू नका. आधी योग्य कारण ओळखा, बागेची स्वच्छता ठेवा आणि Amicus च्या Colicab-Cu चा योग्य वेळी वापर करून आपली बाग हिरवीगार, दमदार अन् रोगमुक्त ठेवा!

    💬 तुमच्या डाळिंब बागेची सध्याची स्थिती कशी आहे? मनात काही शंका असल्यास कमेंटमध्ये नक्की विचारा!

    📲 आणि हा लेख आपल्या प्रत्येक डाळिंब उत्पादक शेतकरी भावापर्यंत नक्की Share करा, जेणेकरून कोणाचेही नुकसान होणार नाही!

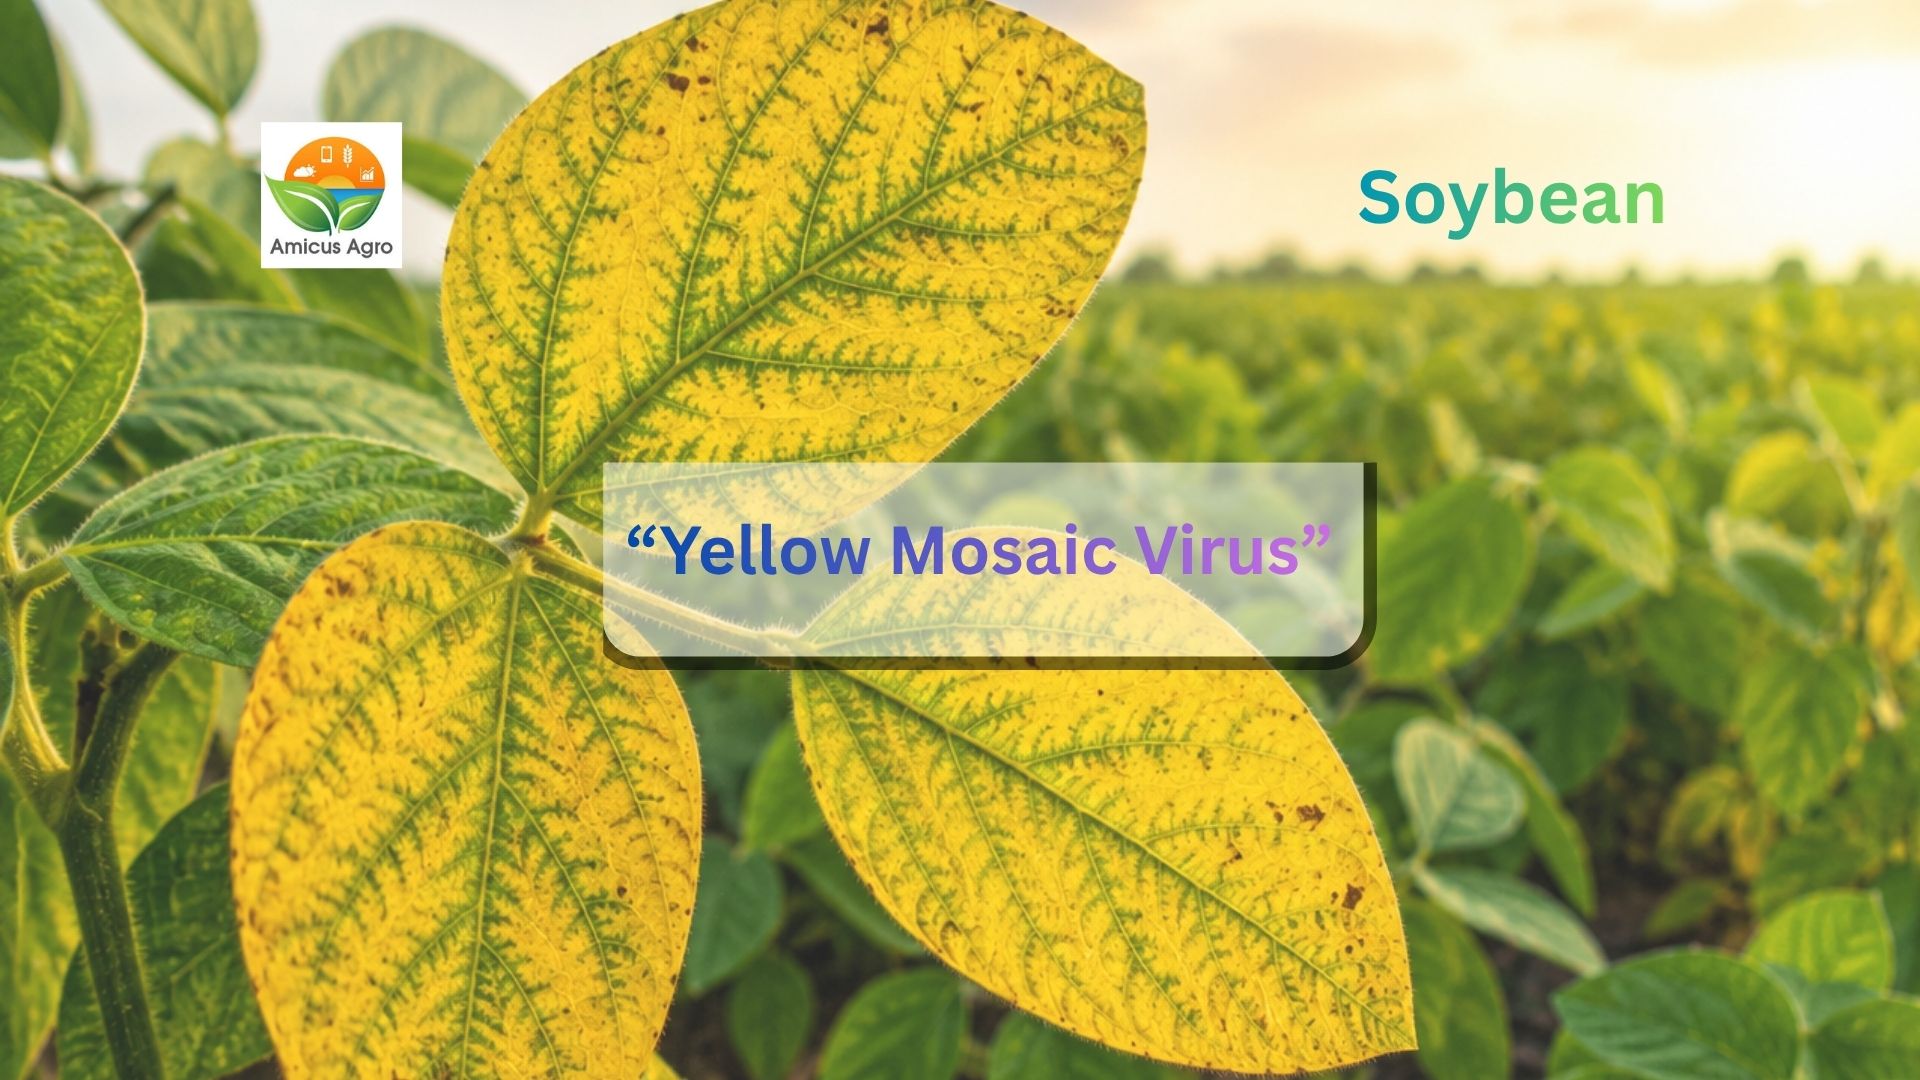
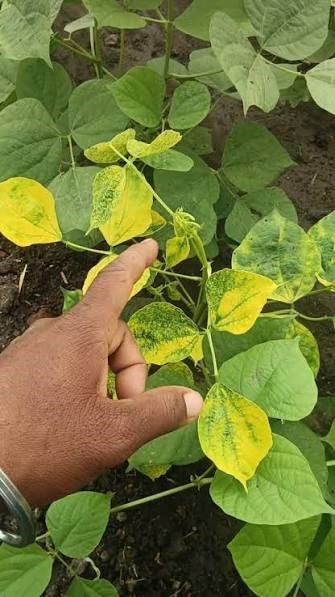
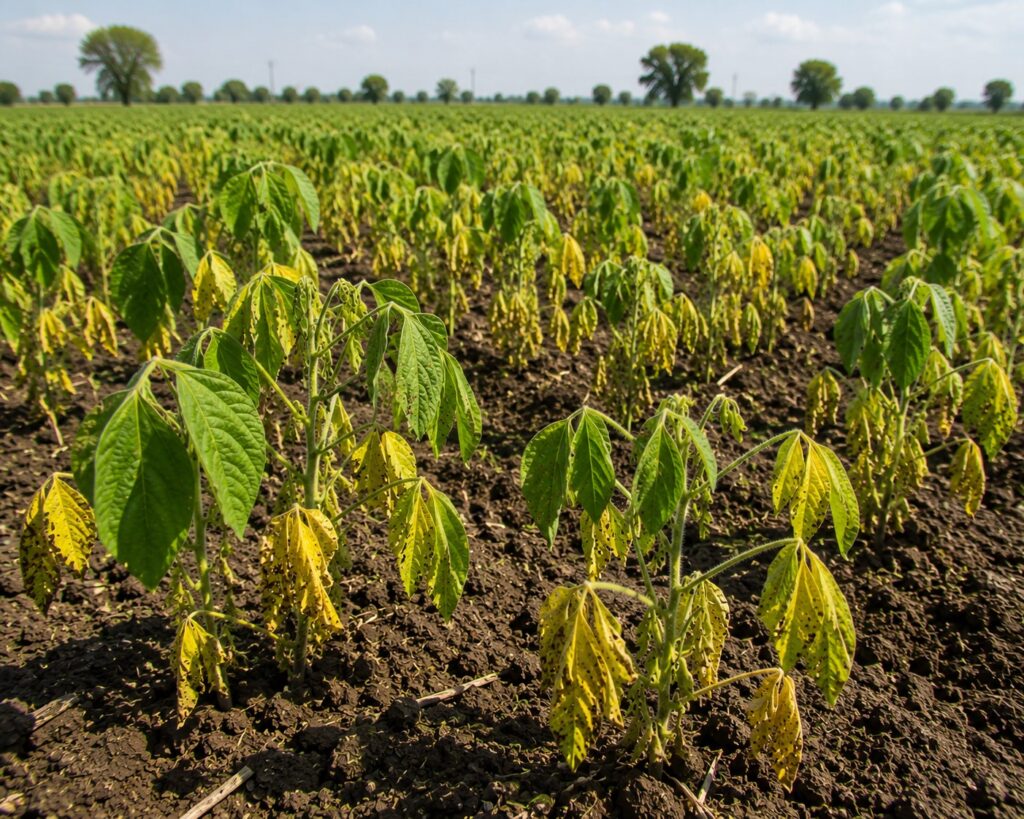
  • Is Your Soybean Crop Turning Yellow? Don’t Panic—Identify the Cause First and Then Take Action!

    Is Your Soybean Crop Turning Yellow? Don’t Panic—Identify the Cause First and Then Take Action!

    When soybean fields start turning yellow, many farmers rush to spray expensive fertilizers or chemicals. But wait! There can be several reasons behind the yellowing of crops.

    Let’s look at the 4 main causes of crop yellowing and their exact remedies:

    1. Continuous Rainfall and Waterlogging

    Due to continuous rains, when water gets logged in the field, the roots cannot breathe (lack of aeration), causing the crop to turn yellow.

    • Remedy: First and foremost, drain out the excess water from the field. Spraying should only be done after receiving a clear spell of 2 to 3 days of rain-free weather.

    2. Nutrient Deficiency

    When the crop does not receive proper nutrition, different symptoms appear on the leaves. For example, in iron deficiency, the leaf veins remain green while the area between them turns yellow. In potassium deficiency, older leaves begin to turn yellow.

    • Remedy: When there is sufficient moisture in the soil, apply any one of the following: Zinc Sulphate (5 kg), Ferrous Sulphate (5 kg), or Micro-nutrient Grade-II (5 kg) mixed with 20 kg of NPK 10:26:26 directly into the soil.

    3. Yellow Mosaic Virus (Viral Disease)

    This is a highly destructive disease transmitted by sap-sucking pests like whiteflies and leafhoppers. If left unmanaged, it can cause up to 90% yield loss.

    4. Incorrect Use of Herbicides

    Using incorrect doses of herbicides, or mixing herbicides with fertilizers/insecticides, causes leaf scorching and stunts plant growth.

    When Traditional Remedies Fail to Revive the Crop…

    In such tough situations, to give soybeans a new lease on life and protect them from stress, AMICARB from Amicus stands as a solid shield by your side!

    Whether it is harsh sunlight, nutrient deficiency, or yellowing—the special nano-technology in AMICARB quickly pulls the crop out of this crisis.

    ⚡ Why does AMICARB act as a ‘Life-Saver’ for Soybeans?

    • Restores green health to the crop: Rapidly increases chlorophyll content in leaves to resume photosynthesis, keeping the crop fresh even under intense heat.
    • Strengthens plant roots deep in the soil, doubling their capacity to absorb nutrients.
    • Enhances the crop’s natural immunity against diseases and stress.

    💧 Application Method:

    • Dosage: 2 grams per liter of water (700 to 800 grams per acre).
    • Ideal Time: 30 to 35 days after sowing, or as soon as yellowing is noticed in the field.

    ☀️ Important Rule During Spraying:

    • Change Spray Timing: Always spray in calm weather either in the morning before 9 AM or in the evening after 4 PM.
    • Use Clean Water: Always use clean water for spraying and use a good quality spreader/sticker so the liquid adheres well to the leaves.

    Conclusion

    My fellow farmers, the period between 30 to 35 days forms the foundation of your entire year’s income. Don’t get discouraged or panic and waste money on unnecessary products if your soybean crop turns yellow. First, identify the exact cause, manage field conditions properly, and use Amicus’s AMICARB at the right time to keep your crop green, robust, and healthy!

    How is your soybean crop doing right now? If you have any doubts, feel free to ask in the comments. And make sure to share this article with every farmer brother so no one suffers a loss!

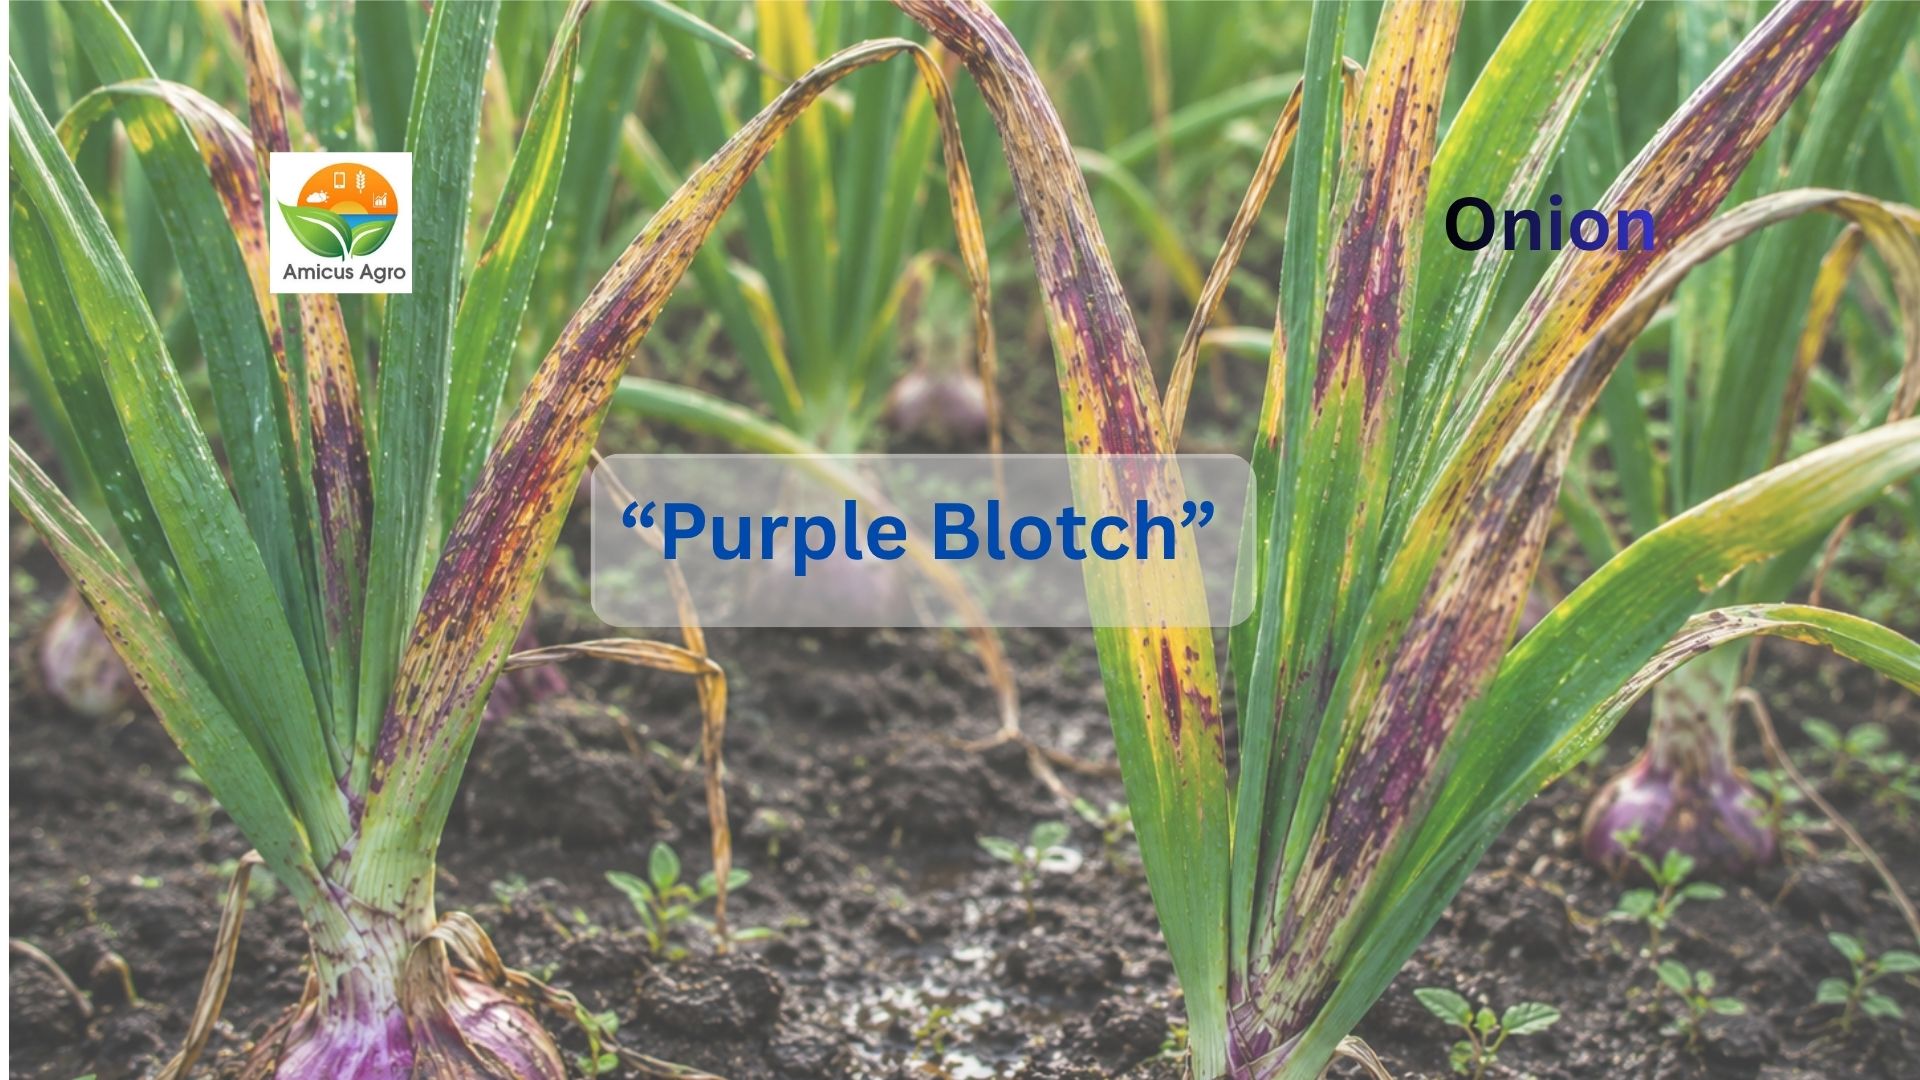
  • Onions Leaves Drying from the Tips and Scorching? Beware! ‘Purple Blotch’ Disease Can Cause Heavy Losses

    Onions Leaves Drying from the Tips and Scorching? Beware! ‘Purple Blotch’ Disease Can Cause Heavy Losses

    Dear Farmer Friends,

    Currently, a major problem is being observed in onion crops. Many farmers are reporting that onion leaves are turning yellow and drying up starting from the tips downward. If you are noticing the same condition in your field, it could be ‘Purple Blotch’ (also known as Jambhala Karpa).

    What is ‘Purple Blotch’?

    It is a highly destructive fungal disease affecting onion crops caused by the fungus Alternaria porri. In local terminology, farmers commonly refer to it as Karpa or Jambhala Karpa.

    Disease Identification and Symptoms

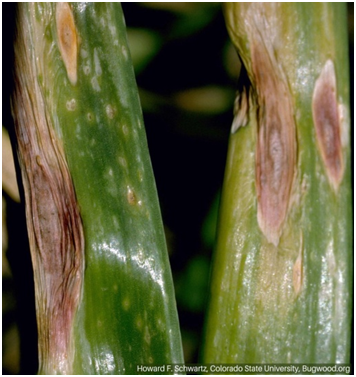
    • Spots on Leaves: Initially, small, pale white, or water-soaked spots appear on the onion leaves.
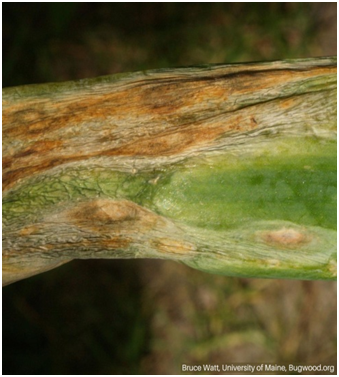
    • Purple Rings: Within a few days, these spots enlarge, turning dark purple or brown at the center, surrounded by a yellowish halo.
    • Drying of Leaves: As the disease severity increases, the leaves begin to dry and scorch from the tip downward.
    • Breaking of Leaves: The leaves become weak at the points where purple spots develop, causing them to bend and fall over to the ground.

    .

    🌧️ Why Does This Disease Spread Rapidly? (Favorable Environment)

    • Continuous cloudy weather and unseasonal rainfall.
    • High atmospheric humidity (moisture) above $80\% \text{ to } 90\%$.
    • Heavy morning dew and sudden temperature fluctuations.

    Impact on Crop and Yield

    When leaves break and dry up, the crop’s photosynthesis (food production) process slows down significantly. As a result, bulb development is impaired, leaving the onions small in size (Galti/Golwa). Additionally, such infected onions do not last long during storage and tend to rot quickly.

    Management and Preventive Measures

    To control this disease, an integrated management approach is essential.

    1. Preventive Measures

    • Crop Rotation: Rotate your crops regularly; avoid planting onions in the same field year after year.
    • Proper Spacing: Maintain appropriate spacing between plants during transplantation to ensure good air circulation.
    • Drainage: Ensure proper drainage so that water does not log in the field.
    • Avoid Excess Nitrogen: Limit the overuse of nitrogenous fertilizers (e.g., Urea), as it makes the leaves overly succulent and more susceptible to disease.

    2. Chemical Spraying

    Fungicide application is necessary at the first appearance of symptoms.

    • Based on expert recommendations, apply suitable fungicides such as Mancozeb, Tebuconazole, or Azoxystrobin + Tebuconazole at prescribed dosages.

    Crucial Tip: Onion leaves have a smooth, waxy surface. Therefore, always add a high-quality Sticker / Spreader to the spray solution to ensure proper adherence.

    Introducing Colicab-Cu

    If traditional fungicides are failing to keep the blight under control, Colicab-Cu—developed through our modern research at Amicus—will serve as an ultimate solution for your crop!

    How COLICAB-CU Works:

    • Direct Attack on Fungal Cells: Its nano-components easily penetrate fungal cells and completely block their ability to synthesize food.
    • Stops Reproduction: It acts on the DNA of the fungus, destroying its ability to produce new spores, thereby halting the spread of the disease on the spot.
    • Restores Leaf Freshness: By controlling the blight, it helps keep onion leaves lush green, ensuring uniform and robust onion bulb growth.

    Recommended Dosage & Application:

    • 💧 Dosage: $2\text{ ml}$ per liter of water (or $800\text{ ml}$ per acre).
    • Best Time to Spray: Always spray during early morning or late evening. Avoid spraying in intense direct sunlight.

    Conclusion

    Although Purple Blotch in onions appears severe, it can be completely managed through field hygiene, early detection, and modern solutions like Colicab-Cu. With proper care, you can secure a healthy and high-yielding onion crop!

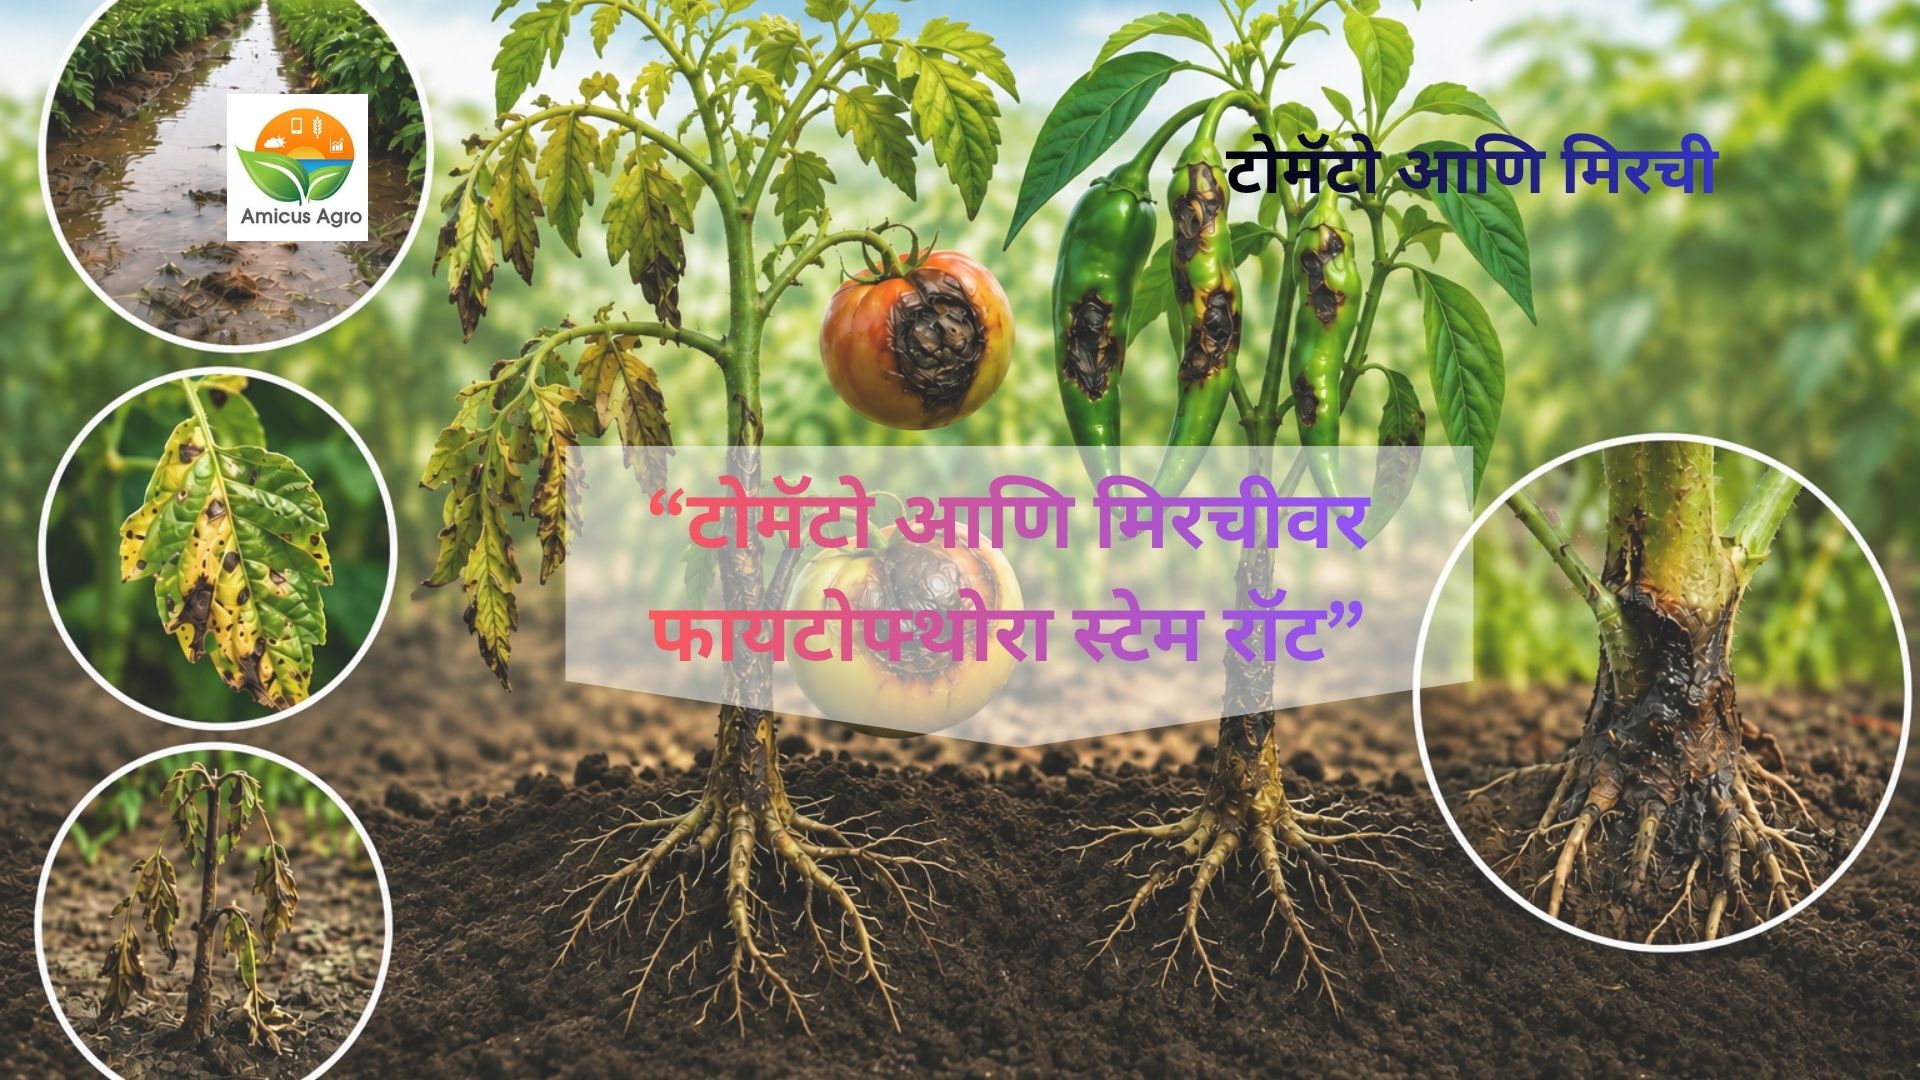
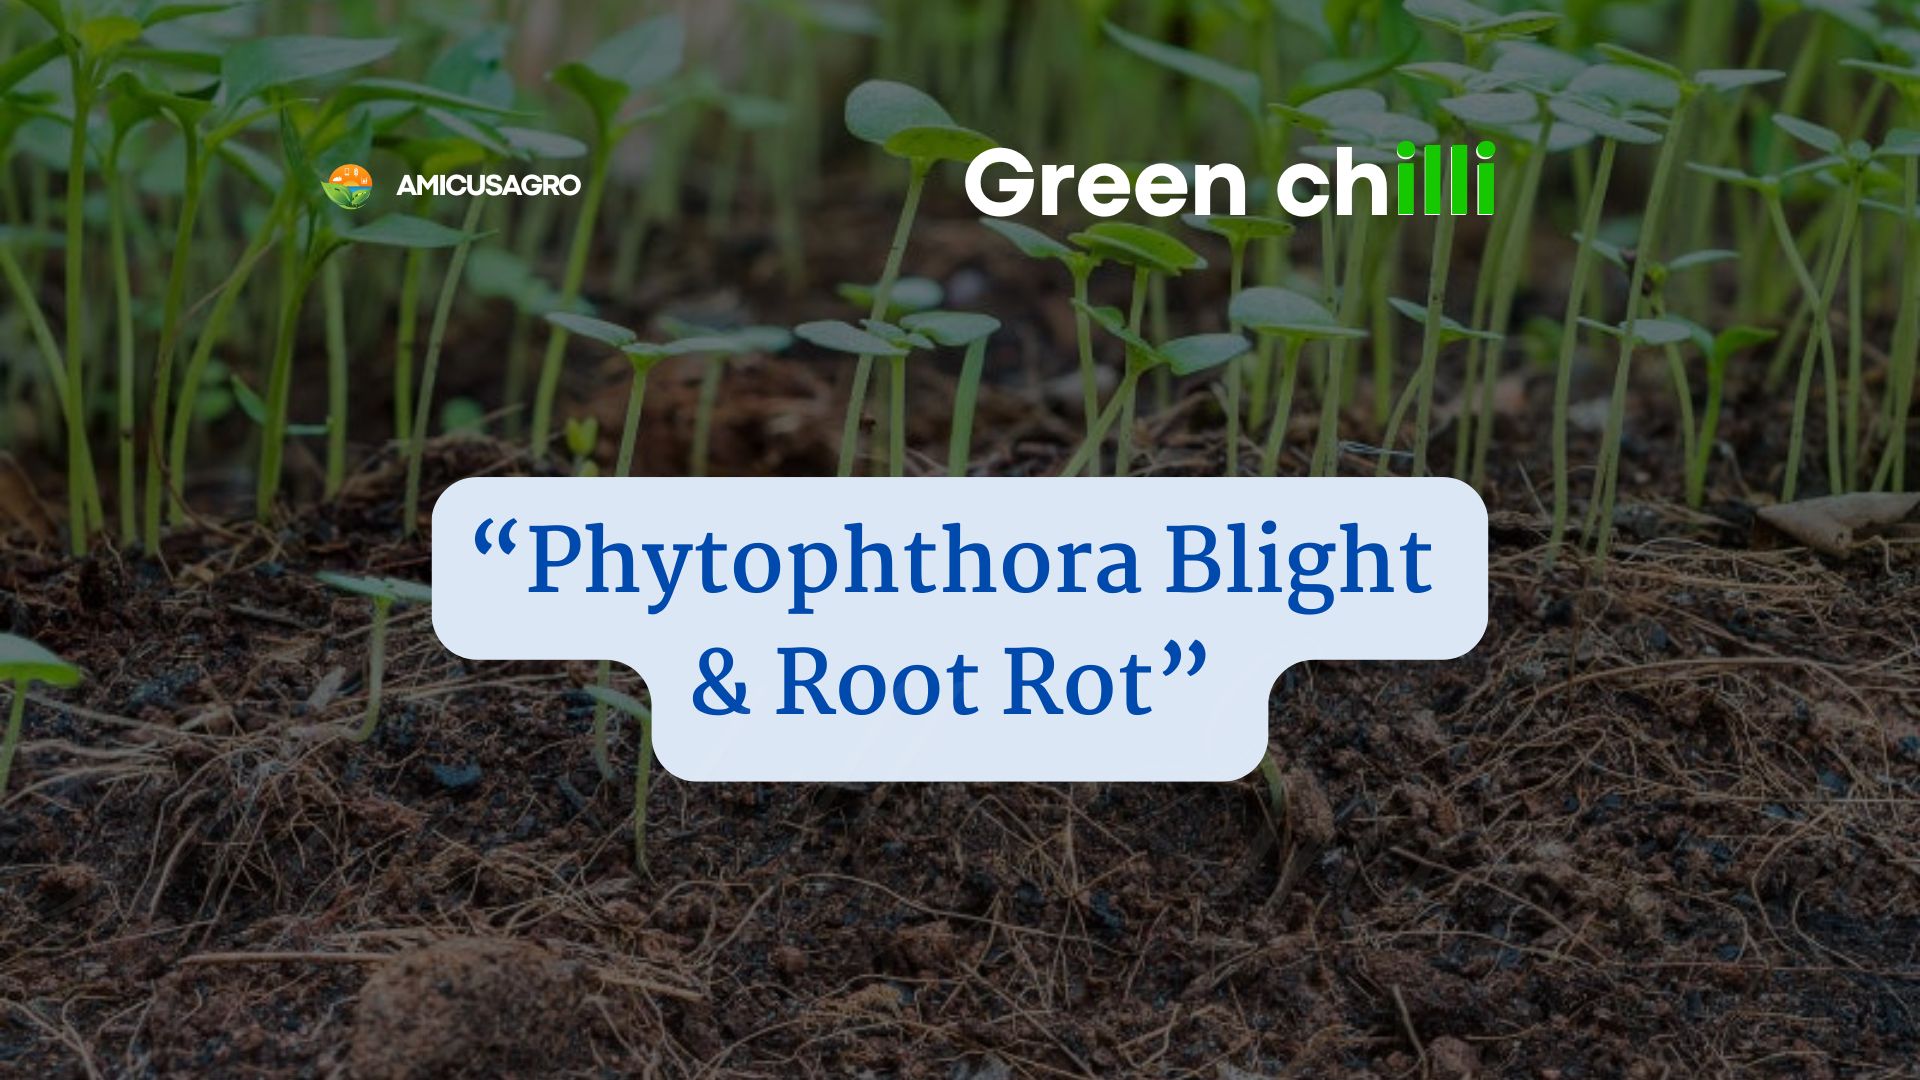
  • Phytophthora Blight & Root Rot in Green Chilli — What To Watch For & How Nano-Solutions Help

    Phytophthora Blight & Root Rot in Green Chilli — What To Watch For & How Nano-Solutions Help

    Why green chilli growers should care

    Phytophthora capsici is a nightmare for green chilli. It attacks roots, stems and fruits, and can cause sudden collapse of plants — especially in low-lying, waterlogged fields. Because green chillies are high-value and often sold fresh, a severe outbreak can wipe out both quantity and marketability.


    🌦️ Conditions that invite trouble (and where chillies get hit hardest)

    Phytophthora doesn’t care about your hard work — it cares about water and warmth:

    • Standing water & poor drainage — root rot starts under the soil. Seedlings and young transplants are extremely vulnerable.
    • High humidity & overhead irrigation — splash dispersal brings spores from soil to stems and fruits → blight that rots fruit and crowns.
    • Warm temperatures (≈ 25–30°C) — ideal for rapid disease development; if these line up with wet weather, you’re in the danger zone.

    Symptoms on green chilli

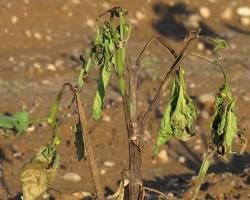
    • Wilting of individual plants or patchy wilting across the bed, often worse after rain.
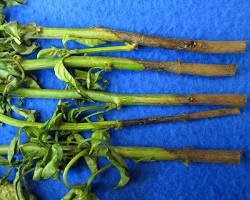
    • Brown/black water-soaked lesions on the lower stem near soil line.
    • Yellowing leaves, defoliation, and sudden plant collapse.
    • Fruit with sunken brown lesions or water-soaked spots — unsellable.
    • Root rot: dark, mushy roots with a poor root system.

    ⚔️ Nano-Copper & Nano-Silver — how they help in chilli fields (Colicab-Cu , Silller-100)

    Nanoparticles are not miracle bullets, but they’re powerful tools in the toolbox:

    Nano-Copper (CuNPs)

    • Attacks oomycete cell walls/membranes and prevents sporangia formation — that means fewer infectious units to spread in the field.
    • Helpful as a preventive soil drench or foliar/soil combo when risk is high (wet season, heavy rains).

    Nano-Silver (AgNPs)

    • Disrupts ATP production and enzyme activity inside the pathogen—causes cellular failure.
    • Good as a complementary spray — adds an antimicrobial mode of action different from copper.

    Why it matters for chillies: fruit and crown infections are economically critical. Reducing sporangia production and killing motile zoospores lowers disease pressure on both roots and fruit surfaces.


    🧩 Integrated Plan for Green Chilli (what to actually do)

    Use nanoparticles as part of a full Integrated Disease Management (IDM) approach — here’s a practical action plan:

    1. Pre-season:
      1. Map low spots and improve drainage (trenches, raised beds, ridges).
      1. Use well-drained seedbeds and harden transplants before fielding.
    2. Planting & cultural practices:
      1. Raised beds or plastic mulch reduce soil splash onto stems and fruit.
      1. Avoid overhead irrigation in rainy seasons; use drip where possible.
      1. Wider plant spacing improves airflow and speeds drying.
    3. Monitoring:
      1. Scout after heavy rains. Look for wilting and stem lesions at soil line.
      1. Use a simple field risk check: recent rainfall + warm temps + waterlogging = high risk.
    4. When to use nano-products (preventive mindset):
      1. Apply preventively in high-risk periods (wet, warm). Once entire canopy/crown is infected, control is much harder.
      1. Use nano-copper as a soil drench in patches known for waterlogging, and as a light foliar spray to reduce inoculum on lower stems.
      1. Consider alternating/combining with nano-silver to diversify modes of action.
    5. Post-infection steps:
      1. Remove and destroy severely infected plants to reduce local inoculum.
      1. Sanitize tools and avoid moving muddy soil between fields.
  • The Silent Killer: Saving Your Green Chili Seedlings from Damping-Off

    The Silent Killer: Saving Your Green Chili Seedlings from Damping-Off

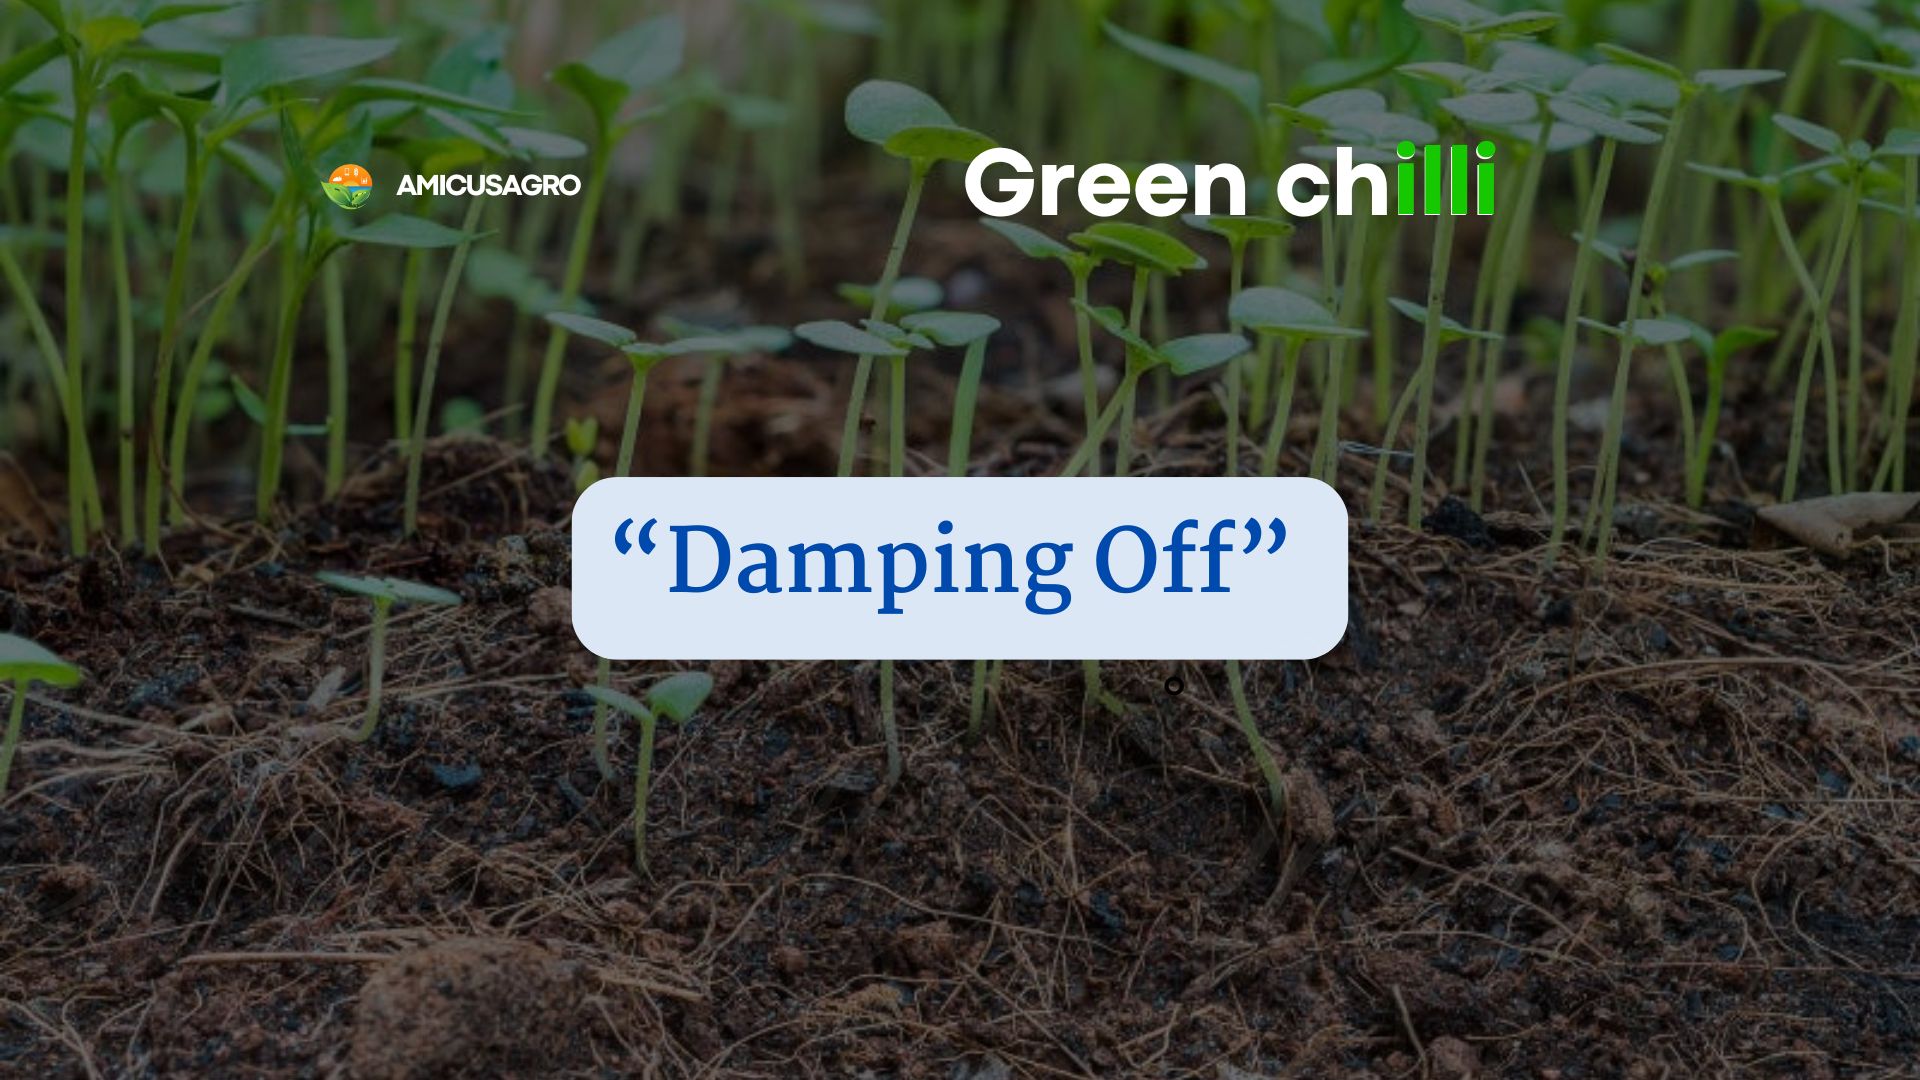
    Ever started your green chili seeds with high hopes, only to find your little sprouts mysteriously wilting and toppling over? You’re not alone. This heartbreaking phenomenon is known as “damping-off,” a devastating disease that can wipe out an entire tray of seedlings overnight.

    But don’t toss your gloves in frustration just yet! In this blog post, we’ll uncover the secrets of this sneaky fungal disease and explore a cutting-edge solution that could be the key to a thriving garden.


    What is Damping-Off and Why Does It Happen?

    Damping-off is caused by common soil-borne fungi and fungus-like organisms, with Pythium being the most frequent culprit. It can strike in two ways:

    • Pre-emergence: The fungus attacks the seed before it even sprouts, so you never see the seedling appear.
    • Post-emergence: The seedling sprouts, looks healthy for a day or two, and then the stem at the soil line becomes weak, soft, and collapses.


    The Perfect Conditions for a Fungal Attack

    These sneaky fungi love a specific environment. If you’re experiencing damping-off, check if these conditions apply to your setup:

    • Excessive Watering: Is your soil constantly soggy? Over-watering is the number one cause of damping-off. The surplus moisture is a perfect breeding ground for pathogens to multiply.
    • Cool Soil Temperatures: These fungi thrive in cool, moist soil. If your seed tray is in a cold spot, the seeds will germinate slowly, giving the pathogens more time to infect them.
    • Poor Drainage: Does water sit at the bottom of your pots? Waterlogged soil and high humidity around your seedlings are like a five-star hotel for these fungi.

    DIY Check: Go check your seedlings. Is the soil cool and soggy to the touch? Let us know in the comments!


    Your Prevention Toolkit: Simple Steps for Success

    Before reaching for a solution, try these simple, low-cost preventative measures to protect your seedlings:

    • Sterilize Your Equipment: Use a diluted bleach solution (one part bleach to nine parts water) to clean all your pots, trays, and tools before planting. This helps kill any lingering pathogens.
    • Use Sterile Seed Starting Mix: Don’t use garden soil. Instead, use a sterile, soilless seed starting mix. This minimizes the risk of introducing pathogens from the start.
    • Improve Air Circulation: Place a small fan near your seedlings to provide gentle airflow. This helps keep the soil surface dry and discourages fungal growth.
    • Bottom Watering: Instead of watering from the top, place your seed tray in a shallow container of water for a few minutes. The soil will absorb the water from the bottom, keeping the top layer dry.

    Share Your Tip: What’s your secret for preventing damping-off? Share your wisdom with other gardeners!


    A Tiny Hero: How Nano Silver (Siller-100) is Fighting Back

    What if there was a way to protect your seedlings with a powerful, yet gentle, solution? That’s where Nano silver (Siller-100) comes in. We are using technology to create a new line of defense against damping-off.

    Here’s how it works:

    • The Cell Wall Breaker: Nano silver particles are so small they can physically damage the cell walls and membranes of the harmful fungi and bacteria. This causes the contents of the fungal cells to leak out, essentially killing them on contact.
    • The Free Radical Attacker: They also generate “free radicals” which are like tiny, destructive bombs that cause widespread damage to the pathogen’s internal systems. This disrupts the fungus’s ability to grow and reproduce.
    • A Sustainable Solution: A key benefit? Nano silver works at much lower concentrations than traditional chemical fungicides, which means it can be a more environmentally friendly option for your garden.

    Share Your Thoughts: Does using nanotechnology in gardening surprise you? What do you think about this modern approach?


    Final Thoughts: Your Next Step to a Bountiful Harvest

    Damping-off can be a gardener’s worst nightmare, but by understanding the conditions that favor it and exploring innovative solutions like Nano silver (Siller-100), you can protect your valuable green chili seedlings.

  • From Powder to Power: Your Guide to Beating Powdery Mildew 🌶

    From Powder to Power: Your Guide to Beating Powdery Mildew 🌶

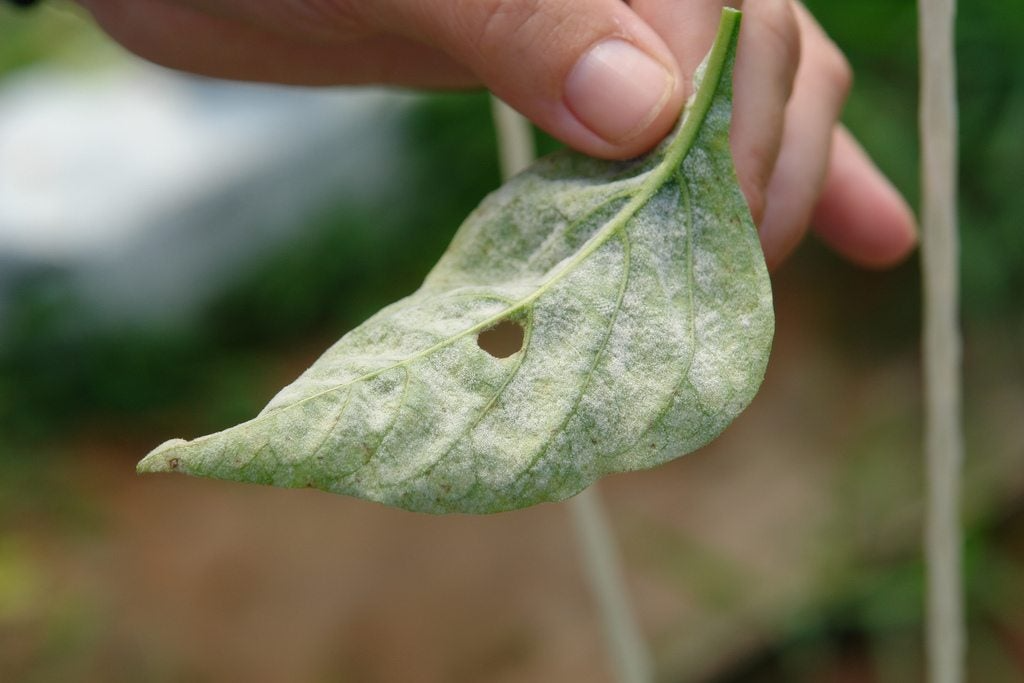
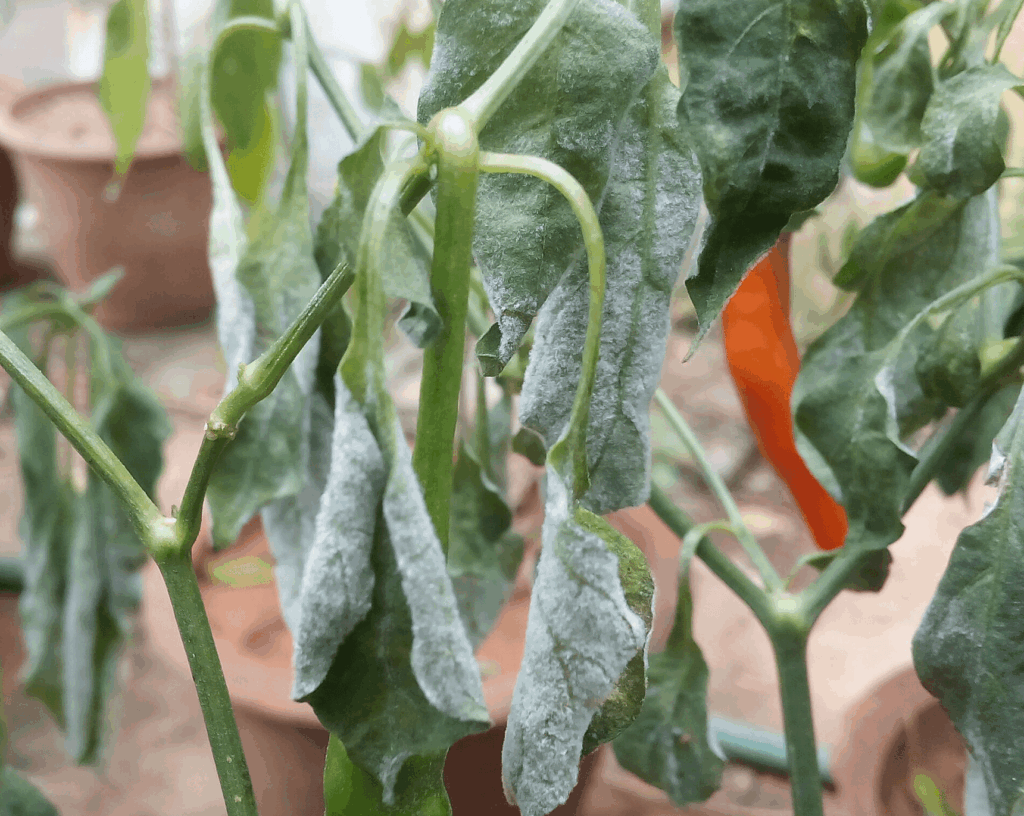
    Ever noticed your green chili plants looking like they’ve been dusted with flour? That’s not a kitchen mishap—it’s powdery mildew, a common and stubborn fungal disease. But don’t worry, you don’t have to surrender your crop! In this guide, we’ll help you understand what this pesky fungus is, how it spreads, and what you can do about it, from simple fixes to cutting-edge tech.


    What’s Happening to My Plant? The Powdery Mildew Breakdown

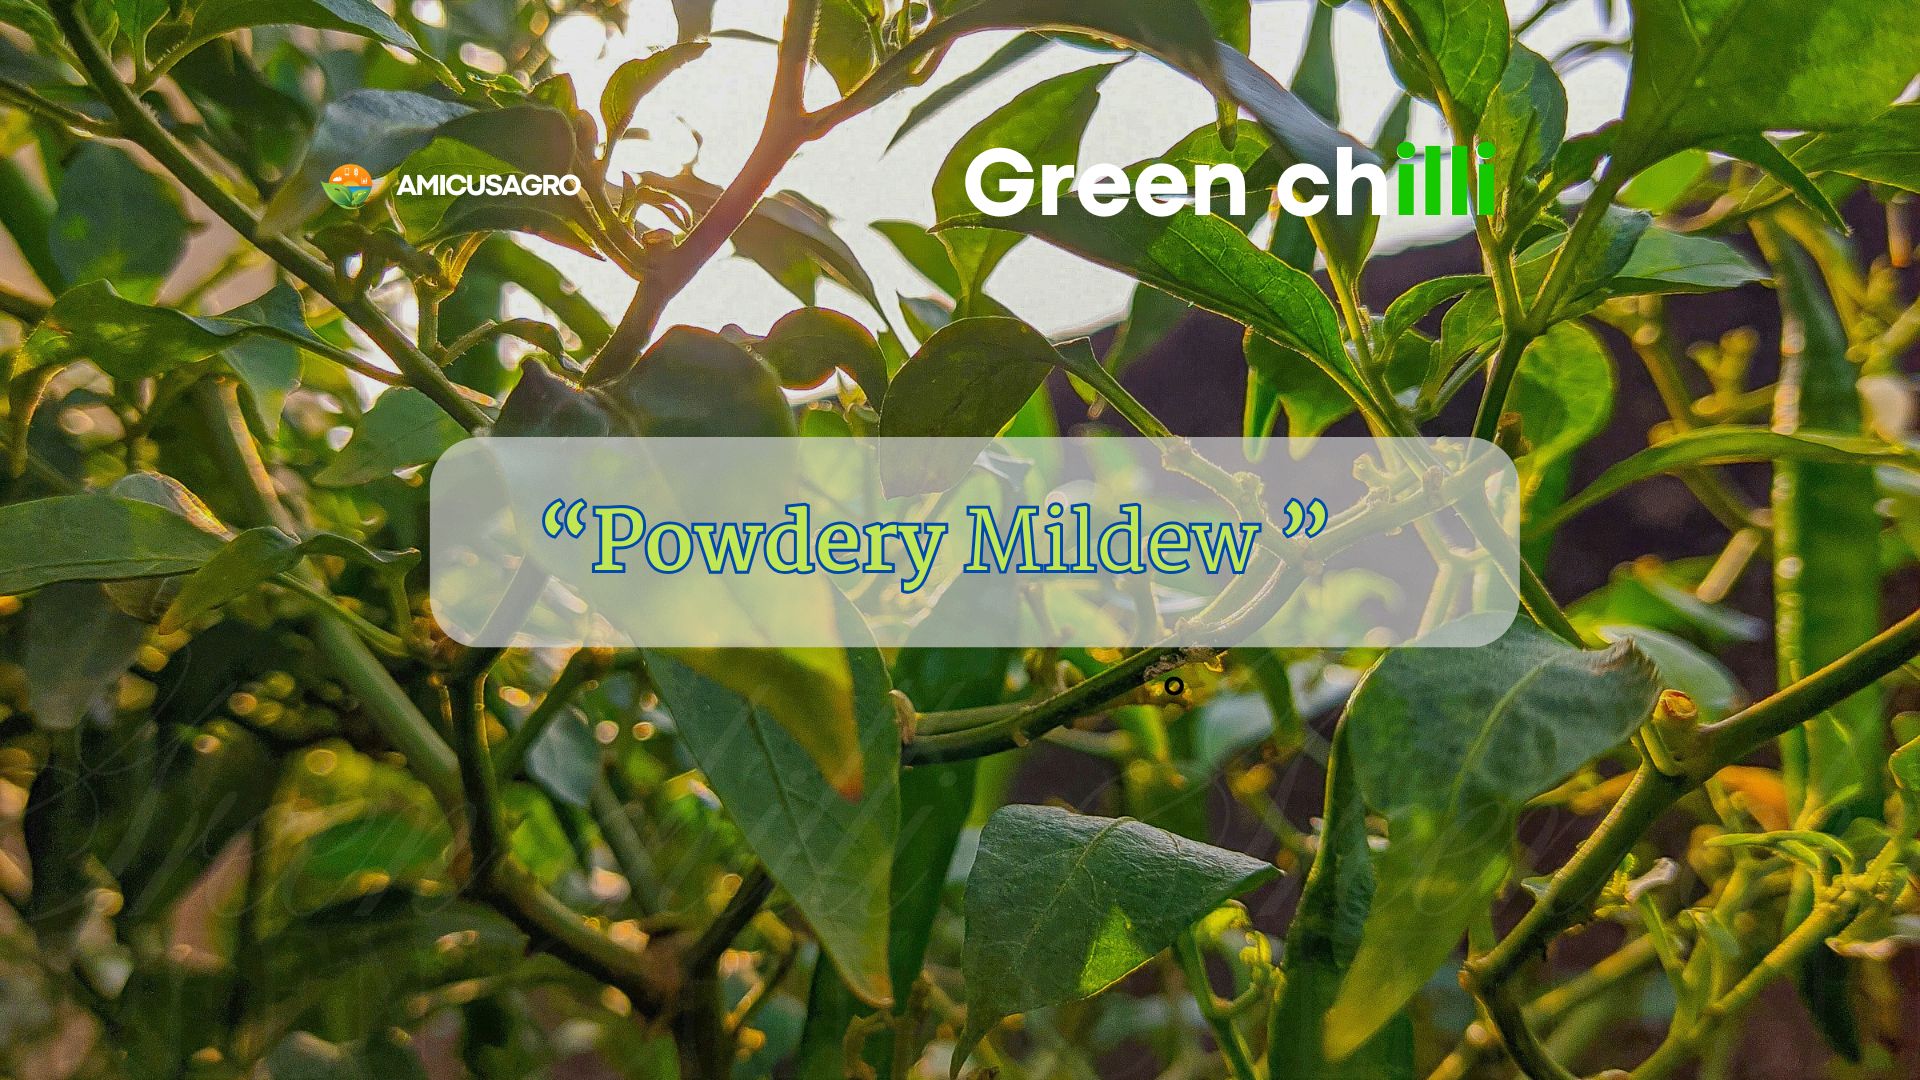
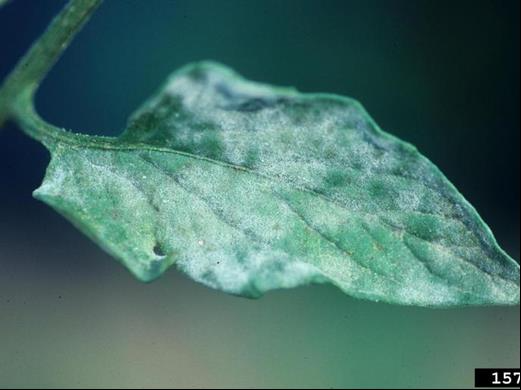
    Powdery mildew on green chili plants is caused by a fungus called Leveillula taurica. It shows up as white, powdery spots on leaves, stems, and sometimes even the chilies themselves. If you ignore it, the leaves can shrivel and fall off, leaving your precious peppers exposed to the sun and ruining your harvest.


    The Perfect Storm: Why Powdery Mildew Loves Your Garden

    This fungus is a master of survival. While many fungi need a lot of water to thrive, powdery mildew prefers warm, dry conditions with high humidity. It’s a bit of a paradox! It loves temperatures between 60°F and 77°F (15°C to 25°C) but gets a little shy when temperatures soar above 95°F (35°C).

    Interactive Poll: Do you live in a climate with hot, dry days and humid nights? (Yes/No)

     powdery mildew on the Green Chilli plant

    Your Game Plan: Simple Steps to Keep Your Plants Healthy

    Prevention is always easier than a cure. Here are some simple, low-tech ways to fight back:

    • Give Them Space: Proper air circulation is key. Make sure your plants aren’t too crowded.
    • Trim It Up: Prune away any thick, bushy sections to help air flow through the plant.
    • Watch How You Water: Water at the base of the plant, not on the leaves, and avoid watering late in the day.
    • Choose Wisely: Next time you plant, look for chili varieties that are resistant to powdery mildew.
    • Try DIY Remedies: Solutions like baking soda or diluted milk sprays can be effective if you catch the problem early.

    Share Your Tip: What’s your go-to home remedy for powdery mildew? Let us know in the comments!


    The Future is Here: Nanotechnology to the Rescue

    For a more advanced approach, we are now using silver nanoparticles (Pensil) to fight powdery mildew. This is a game-changer for high-value crops like green chilies.

    • Nano Silver: Think of these as tiny silver bullets for the fungus. They release silver ions that disrupt the fungus’s metabolism and literally suffocate its cells. They can even damage the fungus’s DNA, preventing it from reproducing.

    Using the silver nanoparticles (Pensil) is a more sustainable option, as it is effective in much smaller amounts than traditional fungicides. It’s a glimpse into the future of farming!


    Final Thought: Whether you use a simple spray or a high-tech solution, staying ahead of powdery mildew is crucial for a healthy and abundant green chili harvest. What step will you take first to protect your plants?

  • The Chili Grower’s Guide: Battling Anthracnose with Modern Solutions 🌶

    The Chili Grower’s Guide: Battling Anthracnose with Modern Solutions 🌶

    Hello fellow growers! Have you ever noticed dark, sunken spots ruining your beautiful green chilies? If so, you’re likely dealing with Anthracnose, a common but destructive fungal disease. But don’t worry—we’ve got the know-how to help you fight back, including some amazing new tech!

    What is Anthracnose?

    Think of anthracnose as a fungal infection for your chili plants. It’s caused by a group of fungi, mainly from the Colletotrichum family. This sneaky fungus loves to attack the fruit, leaving behind those tell-tale, dark, crater-like spots. Sometimes, you’ll even see orange or pink slimy rings on the spots—those are the fungal spores, ready to spread and infect more of your harvest!

    Why Does My Farm Get It? The Perfect Storm

    Anthracnose thrives in a specific environment. If you live in an area that’s warm, humid, and rainy, your farm is the perfect breeding ground.

    • Warmth: Temperatures around 27°C (80°F) are ideal for the fungus to multiply, though it can survive in a wider range.
    • Moisture: This is the key. The fungus needs water to grow and spread. Heavy rains or overhead irrigation that keeps leaves and fruit wet for long periods are its best friend.
    • The Spread: Those tiny spores can travel far! They hitch a ride on splashing water from rain or irrigation, and can even be hidden in contaminated seeds.

    Traditional Ways to Win the Fight

    Before we get to the high-tech stuff, a strong defense starts with good habits.

    • Practice Good Hygiene: Always start with disease-free seeds. Remove any infected leaves, branches, or fallen fruit from your field and destroy them. This removes the source of the infection.
    • Smart Watering: Avoid using overhead sprinklers that drench the plants. Use drip irrigation instead to deliver water directly to the roots, keeping the leaves and fruit dry.
    • Crop Rotation: Don’t grow chili peppers in the same spot year after year. Rotating your crops helps break the fungus’s life cycle.

    The Future is Here: Nano-Silver and Nano-Copper (Colicab-Cu)!

    If traditional methods aren’t enough, new nano-tech offers a powerful solution(Colicab-Cu). These microscopic particles are a game-changer!

    • Nano-Silver (AgNPs): Imagine tiny silver bullets targeting the fungus. These nanoparticles punch holes in the fungal cell walls, making them leak and die. They also block the fungus from producing energy, effectively starving it to death.
    • Nano-Copper (CuNPs): Copper nanoparticles are like microscopic warriors that create a toxic environment for the fungus. When they enter the cell, they produce Reactive Oxygen Species (ROS), which are highly destructive molecules. This process, known as oxidative stress, completely destroys the fungal cell from the inside out.

    The best part? Because they are so small and effective, you can use a much lower dosage compared to traditional fungicides, making it a more efficient and potentially safer option.

    Have you ever faced anthracnose on your farm? What methods have worked best for you? Share your experience in the comments below!

  • Protecting Your Onions: A Guide to Managing Fusarium Basal Rot 🧅

    Protecting Your Onions: A Guide to Managing Fusarium Basal Rot 🧅

    Causes of Fusarium Basal Rot

    This disease is caused by the fungus Fusarium oxysporum f. sp. cepae. 🧅

    The fungus primarily enters the plant through a few key pathways:

    • Through the Basal Plate: The fungus directly infects the “basal plate,” which is the hard, plate-like area at the bottom of the onion bulb where the roots emerge.
    • Wounds as an Entry Point: Any damage or wound to the basal plate significantly increases the risk of infection. The fungus can also spread through the soil, infecting the roots and basal plates of neighboring plants.

    Once inside, the fungus rots the basal plate, severing the connection between the roots and the bulb. This cuts off the plant’s supply of water and nutrients, causing the leaves to turn yellow and die back, which stunts the plant’s growth.


    Ideal Environment for Fusarium Basal Rot

    This disease is primarily triggered by warm soil temperatures.

    • Temperature: The ideal temperature range for disease development is 25°C to 29°C. The disease is rarely a concern in cooler soil temperatures below 15°C.
    • Continuous Cropping: Similar to other soil-borne diseases, planting onions in the same field year after year can lead to dangerously high populations of the Fusarium fungus.

    Integrated Management: The Best Control

    • Crop Rotation: The most effective way to reduce the Fusarium population in the soil is to rotate with non-host crops (like corn, lettuce, or cereals) for at least four years.
    • Planting Time: In regions with hot summers, plant earlier in the season so the crop can mature before soil temperatures get too high, minimizing disease pressure.
    • Enhance Soil Health: Healthy, well-draining soil fosters robust root systems that are more resistant to infection.
    • Fungicides: To protect the roots and basal plate, fungicides specifically for Fusarium should be applied to the soil via spraying or drenching.

    The Role of Nano Silver (Siller-100)

    • Nano Silver: Nano silver is an effective disinfectant for soil. Its microscopic particles can actively destroy the Fusarium fungus when applied as a drench. Its ability to disrupt the fungus’s cell walls and metabolism provides strong protection for the roots, especially when seedlings are still vulnerable.
  • Understanding and Preventing Damping-Off in Onion Cultivation 🧅

    Understanding and Preventing Damping-Off in Onion Cultivation 🧅

    Why Damping-off Occurs 🦠

    Damping-off is a serious disease in onions caused by a complex of various soil-borne fungi, most frequently Pythium, Rhizoctonia, and Fusarium. The disease attacks in two primary ways:

    1. Pre-emergence Damping-off: The fungus attacks and rots the seed before it can sprout and break through the soil. From a farmer’s perspective, this looks like empty patches in the seedling tray or extremely poor germination. 😔
    2. Post-emergence Damping-off: This is the classic symptom. After successfully sprouting, the seedling abruptly develops a thin, constricted, or water-soaked lesion at the soil line. The stem becomes weak, can no longer support the seedling, and it topples over and dies, even though the upper leaves might still look green.

    The Ideal Conditions for Damping-off 🌧️

    The primary factors influencing damping-off are the nursery’s soil and surroundings.

    • Overwatering and high soil moisture are the most common causes.
    • Poor Drainage: Waterlogging results from using heavy, compacted soil or seedling trays that lack sufficient drainage holes. 💧
    • Cloudy, damp, and cool weather: Slowed growth caused by low light and cool temperatures means seedlings remain in their vulnerable stage longer, giving the fungus more time to attack. ☁️
    • High Seed Density: Excessive seeding results in spindly, feeble seedlings and poor air circulation, which retains moisture at the soil’s surface.

    How to Control It 🛡️

    The best way to control damping-off is to prevent it. This involves controlling the nursery environment and safeguarding the seed and seedling.

    • Use Sterile Media: Start your seedlings with a sterile, well-draining, soilless potting mix. Make sure the nursery has adequate ventilation or use a fan to keep the soil surface dry. 🌬️
    • Plant Sparingly: Avoid planting your seeds too densely. 🌱

    Role of Nano Silver (Siller-100) 🧪

    Nano silver (Siller-100) can effectively disinfect the soil. Its microscopic particles actively kill Pythium, Rhizoctonia, and other damping-off pathogens when applied as a drench within the soil. Its dual mechanism of causing cell wall damage and metabolism disruption results in a potent sterilizing effect in the root zone. This makes it effective for both prevention and halting the spread of an outbreak to other seedlings in a tray. ✨

    Did you find this information helpful? Like and share this post with other farmers, and leave a comment below with your own tips for preventing damping-off in onions!

  • Understanding and Preventing Black Mold on Onions 🧅

    Understanding and Preventing Black Mold on Onions 🧅

    Why Black Mold Occurs

    The culprit behind black mold on your onions is the fungus Aspergillus Niger, which is commonly found in dust, soil, and the air around us.

    How Onions Get Infected 🦠

    • Physical Damage: This is the most common way for the fungus to gain a foothold. Cuts, scrapes, and bruises that occur during harvesting and transportation provide the perfect entry points.
    • Improper Curing: When onions aren’t dried properly, the fungus can easily infect the moist necks and outer skins.
    • Pest Damage: In the field, wounds from pests like onion maggots can leave an opening that the mold can later exploit in storage.

    The Ideal Conditions for Mold Growth 🌡

    Black mold is primarily a storage disease that thrives in specific conditions.

    • High Temperatures: Heat is ideal for the fungus’s growth, with the best temperatures being between 28°C and 35°C. It also requires high humidity, usually above 80% relative humidity.
    • Poor Ventilation: Mold thrives in stagnant, humid environments where inadequate airflow traps heat and moisture.

    Controlling Black Mold

    Preventing black mold through proper handling and storage is always the best approach. Chemical treatments are a second line of defense.

    • Cure Well: Before storing, ensure the outer skins are completely dry and papery, and the onion necks are tight.
    • Store Properly: Keep onions in a cool, well-ventilated area to maintain low humidity. While the ideal storage temperature is near 0°C (32°F), any cool, dry location is better than a warm, humid one.

    How Nano Silver Can Help (Siller-100)

    • Nano Silver 100 PPM: This actively kills spores that are already on the bulb’s surface. Its tiny particles damage the fungus in several ways: by breaking down its cell walls, interfering with its metabolism, and preventing it from reproducing. This makes it a great way to clean bulbs before long-term storage.

    Did you find this information helpful? Share your thoughts in the comments below or pass this on to someone who might find it useful!